Door handles, and anything else you need to pull, are important transmission points for viruses and bacteria. So, with all the concerns these days about Corona-viruses and COVID-19, this design was created as a puller for door handles you can use around your home, or even to give to relatives and friends to help keep them safe too. It was designed to close into a case, with a latching action to make sure it didn’t come open when not wanted and thus cause unwanted contamination. And if it takes your fancy, you can even use it as a fidget spinner to help ease virus-related anxiety: the puller is held in place by two rings, with glue only between the inner and outer ring, so that the case can rotate around the rings too.
Quick summary of this 3D creation
Overview: A 3D design for a door puller to reduce hand contact with surfaces that may be contaminated with viruses.
Location: Not applicable.
Date/era: Modern, 21st Century.
Software used: LibreCAD, OpenSCAD.
Intended use: 3D printing with fused filament printers, mostly with minimal support material if oriented correctly.
The design of the puller and its case were first drawn up in LibreCAD, which is an excellent free and open-source computer aided design (CAD) application you can use on Windows or Linux. As well as allowing easy creation of accurate 2D designs, LibreCAD also has the advantage of saving DXF files. The 2D designs include features to allow latching of the puller in the case, as well as a hole for attaching a lanyard. OpenSCAD was then used to import the components from the CAD DXF file and linear-extrude them.
And to make things easier the individual 2D parts were saved to separate layers in LibreCAD, so OpenSCAD could operate on each separately. If you’re interested in how the OpenSCAD code works, here’s an example of how the case was constructed by importing 2D parts from different layers in the DXF file, extruding them to a solid block, moving the block to the correct position, and finally fusing them together in a union(). If you’re not used to OpenSCAD code you may notice that those operations are reversed, but that’s only because the operations affect the subsequent ones until a semicolon, or a closing brace, is found.
module make_case()
{
rotate([90,0,0])
{
union()
{
translate([0,0,(opener_height/2)+(shell_thk/2)+between-0.05])
linear_extrude(height = shell_thk, center = true, convexity = 10)
import("DoorOpener.dxf",layer="TopCase");
translate([0,0,0])
linear_extrude(height = opener_height+(2*between), center = true, convexity = 10)
import("DoorOpener.dxf",layer="InsideWalls");
translate([0,0,-((opener_height/2)+(shell_thk/2))-between+0.05])
linear_extrude(height = shell_thk, center = true, convexity = 10)
import("DoorOpener.dxf",layer="BottomCase");
}
}
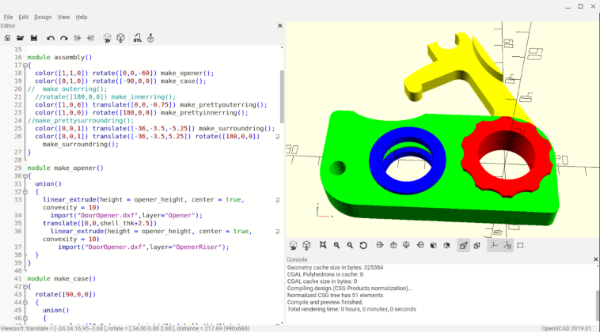
}Constructive solid geometry (CSG) was then used to form the final shapes. Firstly, that involved using the union() operator to fuse together the already extruded top, middle wall and bottom components of the case. Then, the puller itself was formed as a union between the puller block and the small curved handle that can be used to extract it from the case. Then the rings the puller rotates around, and some to pretty-up the finger holes, were made directly in OpenSCAD as they only required CSG operations on the cylinder 3D primitive. Basically, that involved a union of two cylinders, the wider one being moved to the end of the narrower one before applying the union() operator. The fancy cog-like rings were formed the same way, but with cylinders used to cut material out of the ring using the difference() operator. You can see the puller in OpenSCAD in the screenshot below.
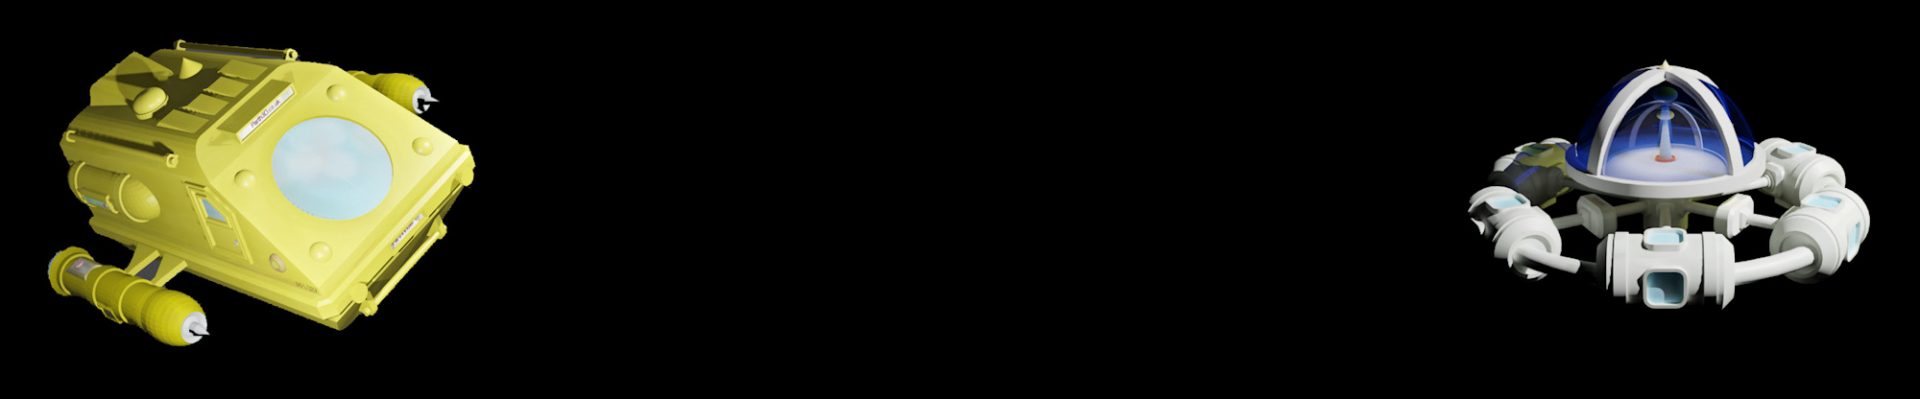
The surrounds for the finger holes were intended as a way to finish off the look and increase the possible number of filament colours: an important design goal was for the puller not to look sterile and medical (there’s enough anxiety around viruses already, so why add to that). The addition of the cog-like versions was therefore intended to further increase the possibilities for varying the finished puller look and feel, as well as giving the opportunity for making it easier to identify which way you’re holding the puller if used in low light, or if users have sight issues. I think these little details helped transform a fairly mundane design into a more interesting and user-friendly finished project. You can see how the assembled model will look on Sketchfab below (click the play button to load the model and view it in 3D).
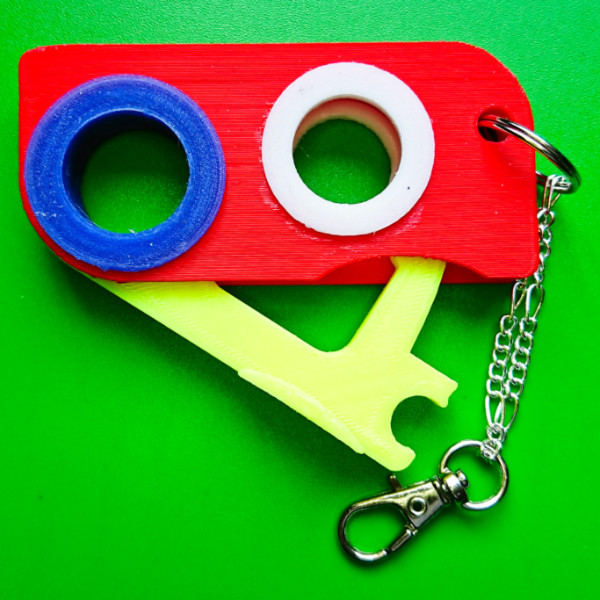
The example print in the photo was made on a Monoprice Mini 3D printer. The puller component was printed flat on the print bed in order that the filament be extruded around the outline: that helps ensure it is strong and rigid, and so less likely to break along print-layer interfaces when in use. The case was printed on its edge, meaning that only the minimum of support material was needed to hold up the tops of the holes.
If your printer is well set up, properly fusing layers of filament, the case wall thickness should then be enough to minimise the risk of later breakages along layer interfaces. The rings should require no supports if printed with the wider part on the print bed. A keyring loop was added to finish the job (a caribiner would work too if you prefer) and made it easy to carry on a bag or belt loop.
If you’d like to 3D print this project yourself, you can click here to go to the MyMiniFactory page, or here for the Thingiverse page, to download it, where there are also instructions on how to put it all together. The page also includes the LibreCAD and OpenSCAD files, so you can even customise the design if you want to (look under ‘Object parts’ in the MyMiniFactory description if you can’t find the design files there).
So finally, in case you’d like to use the methods in this project for your own work, let’s recap on what was involved:
- The design was intended to be slightly chunky and to latch closed when not in use, and the closed puller can be used as a fidget spinner if properly assembled with minimal glue use.
- The shapes involved in the puller and case were first drawn to accurate dimensions in LibreCAD, and saved as DXF files.
- OpenSCAD was then used to linear extrude the shapes and constructive solid geometry operators used to create the solid parts.
- OpenSCAD was also used to create ancillary parts where based on simple primitives such as cylinders.
- The finished 3D model was then test printed in PLA, and found to print to an acceptable quality.
- Once the puller is located in the case the outer ring can be inserted, followed by the inner ring with a little glue only on the outside of it so the puller can rotate freely.
- The other rings can be glued to the finger holes to improve the appearance.
- The parts can be 3D printed in varying colours to allow a more friendly appearance.
Please note that this design is provided without any license for commercial use. It is intended simply as a model you can have the fun of printing yourself. But, however you use it, take care and avoid the viruses 🙂


