
Obviously, 3D photography has historically mostly focussed on taking multiple photos, of different views, from different positions and angles. But, nowadays, we also have some more options, like time-of-flight depth cameras and artificial-intelligence-based 2D to 3D converters. So I thought it might be fun to add to the Photos3D Python library with a depthmaps module that can convert RGBD images (for example as below: half normal RGB image, half depth map image) to stereoscopic pairs. At the moment it’s a simple and very experimental method, but later I hope to make it a little more sophisticated. So I thought I’d write a post in case anyone else would like to use, or improve, it.
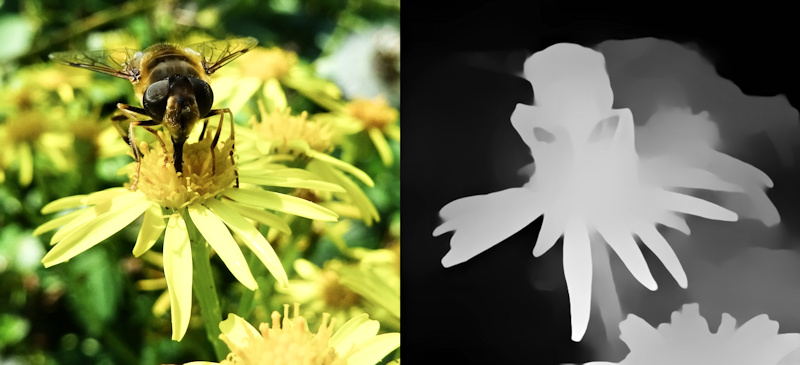
The above example was made using the Looking Glass Blocks AI 2D photo to hologram convertor. It did a pretty good job of creating the depth map, although it had trouble with the depths for the bee’s wings. You can find the RGBD image on the Photos3D Github repository, together with the library code and an example called depth2sbs.py. That example is intended for anyone who wants to delve under the hood of the code, so below is a much simpler example to start you off. Basically it just loads the side-by-side RGBD image and splits it into ones for RGB and depth (you can load separate RGB and depth images too – see library code). Then a single line of Python code does all the work before Matplotlib plots the 3D image.
import os
from matplotlib import pyplot as plt
from photos3d import depthmaps as dm
fname = os.path.join(".", "testimages", "beeflower.jpg")
sbs = dm.quick_rgbd_to_stereo(fname, strength='medium', converge='far', maxwid=1000)
plt.imshow(sbs)
plt.axis('off')
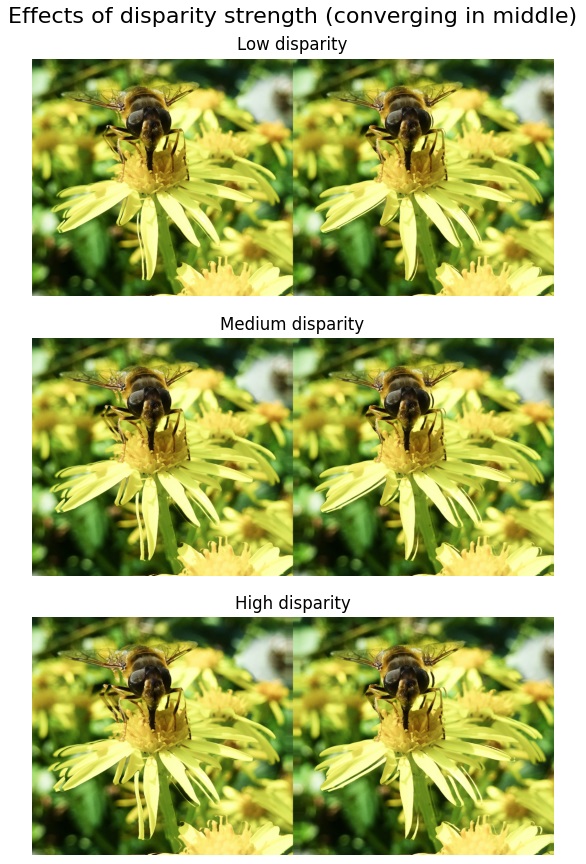
plt.show()The stereo picture is really just a Pillow image, so we can save it easily using, for example, sbs.save(“sbs.png”) if we want to as well. Below are some I’ve saved to illustrate the ‘strength’ parameter, which can be ‘low’, ‘medium’ or ‘high’. That simply determines how much we shift pixels depending on depth. You can play with that to get a 3D strength you’re comfortable with, higher disparity causing low-depth areas to ‘pop out’ of the page more. And if you’re adventurous you can even use numeric values to get greater adjustment, which the library code should hopefully make clear.
You can also play with varying the depth point at which disparity reduces to zero. As well as a numeric value for advanced users, you can choose ‘near’, ‘middle’ and ‘far’. In a sense you could say this lets you vary where your gaze would be focussed on in real life. So if the main object is near the front you use ‘near’, and the same for middle and far (i.e. the back of the scene). This can have a big effect on how well the 3D effect works, so you’ll need to experiment to get the best results. I’ve put some example outputs below to give you an idea of the effect of this ‘converge’ parameter.
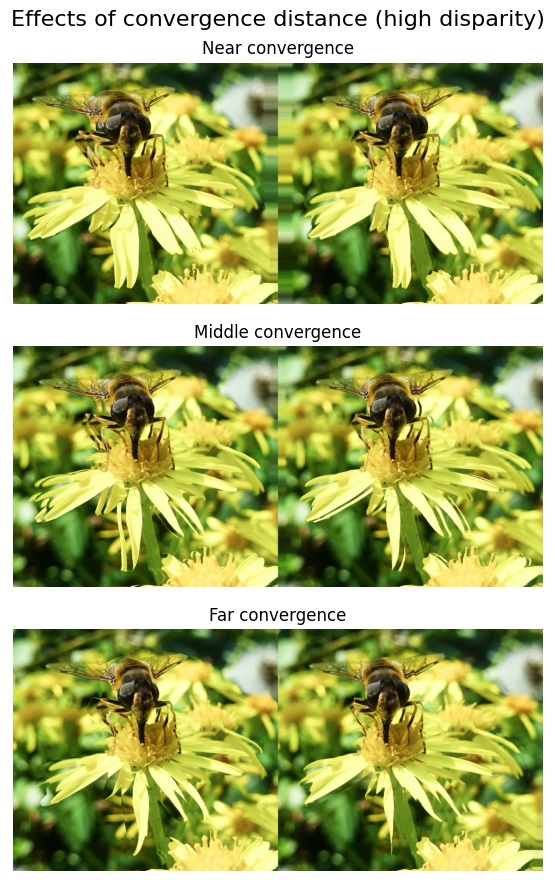
At the moment the library is very simple, and you’ll see that artefacts occur in the finished side-by-side images: note, for example, the multiple petal edges in some images. That’s especially true when using strong disparity and less appropriate convergence distances. So the next steps in coding the library will include:
* Using a depth buffer to make sure the nearest pixels are always used, as currently the colour of each pixel is simply set left to right, with no consideration of whether multiple original pixels will be shifted to the same position.
* The ability to use calculation of depths at angles around the horopter (see Wikipedia), instead of using rays essentially parallel to the Y-axis. That should make the images look more natural, as if viewed from eye locations, including calculations based on shifting the angles for left and right views.
So that’s what’s new in the Photos3D library and I hope you enjoy it 🙂


