
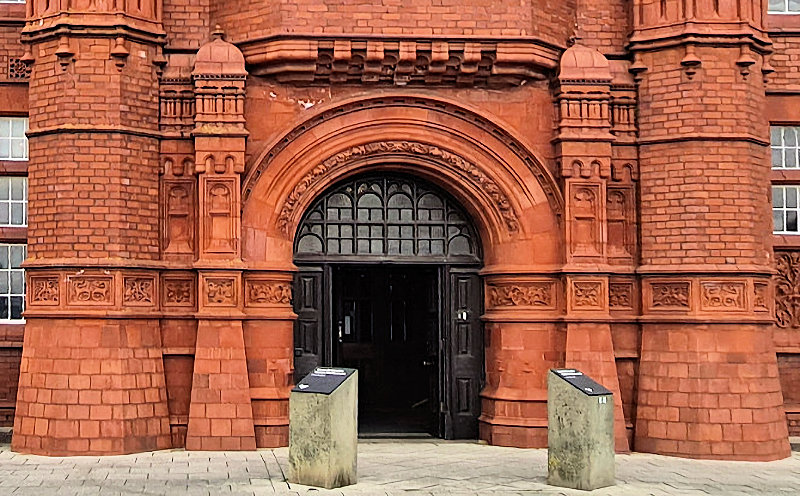
The Pierhead Building at Cardiff Bay was originally the headquarters of the Bute Dock Company, but today it is a wonderful part of the city’s waterfront. Among the amazing features you can find there are glazed red terracotta tiles, including ones depicting the Welsh Dragon and floral designs. If you saw my older post about the dragon tiles you’ll know I 3D scanned one, with the Sony 3DCreator Android app, a few years ago. So, when I visited again earlier this year, I decided to see if I could improve on that work by applying modern smartphone photogrammetry to both a dragon tile and a floral one. And I think the results show just how much photogrammetry has improved in only a couple of years.
Quick summary of this 3D creation
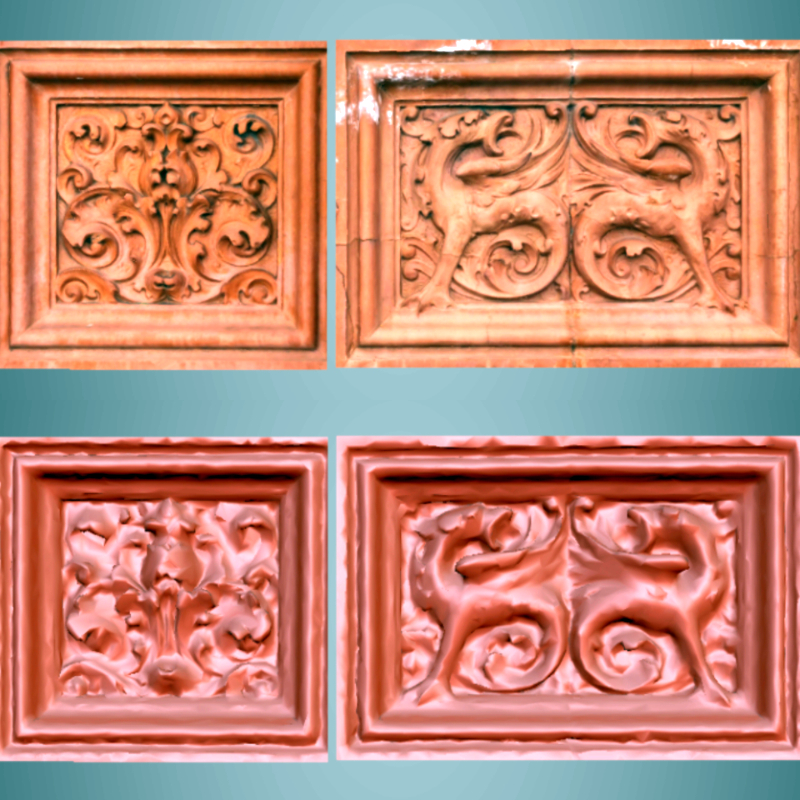
Overview: A 3D scan of two red glazed terracotta tiles.
Location: Pierhead Building, Cardiff Bay, South Wales, United Kingdom [map].
Date/era: Victorian, circa 1897.
Software used: Kiri Engine, Meshmixer, Blender.
Intended use: 3D printing, either in resin or fused filament, or digital uses.
Download: Sketchfab (textured OBJ), Thingiverse (STL), MyMiniFactory (STL).
According to Wikipedia the Pierhead Building was built in 1897 with a French-Gothic Renaissance theme, so the tiles are a nice example of Victorian architectural embellishment, as well as being an important part of Welsh architectural history. And to scan them I used the brilliant Kiri Engine, uploading only 36 12 megapixel smartphone images for the dragon tile, and just 23 for the floral one. I chose high quality settings for the mesh (to help ensure sharp edges were retained) and medium for the limited texture available (a 2048×2048 pixel image). You can view the finished scans, placed side by side in Blender, on Sketchfab below (click the play button to load the scan and move it around).
A number of PC programs were used to make the finished digital-use scans you can find on Sketchfab. To start off I used Meshmixer to orient and trim the mesh, as usual simply because I find the plane-cutting tool very quick and easy. The texture image was then enhanced in Paint Shop Pro 2023 and the mesh decimated, to around 10% of the original vertices, in Blender. You can see the results in the image below.
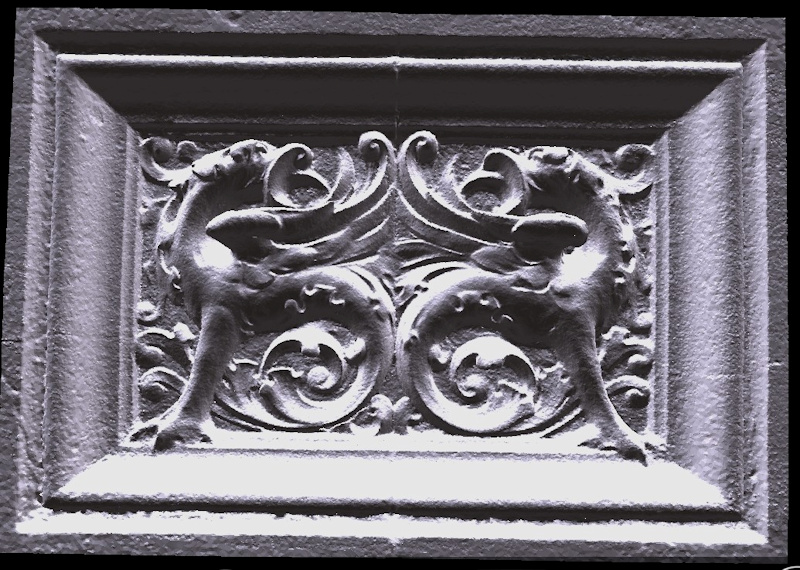
For the 3D printable versions, which can be found as STL files on MyMiniFactory and Thingiverse, I first oriented and trimmed the scans in Meshmixer. Then in Blender I extruded and trimmed the model to give the scanned tile surface depth. After that Meshmixer was used to re-mesh the model to a sensible file size, using the sharp edge preserving method. I think that worked well, giving quite good detail in the STL file, as you can see for the dragon tile below.
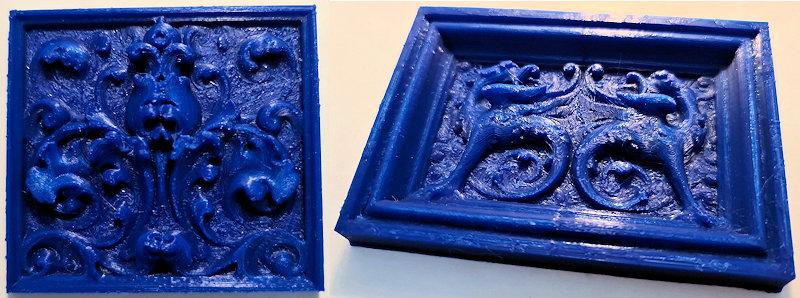
I tested the STL files on my Flashforge Adventurer 3C 3D printer, using PLA filament. I’ve put some photos below, and I think the 3D prints came out quite well in fused-filament PLA, without needing any support material.
When I did the previous 3DCreator scan of the dragon tile I was amazed that I could recreate these old Victorian terracotta tiles at all. So I’m really quite astounded at just how much Kiri Engine, with very few photos to work on, has improved on that work 🙂


