
When it comes to rendering 3D scenes on iOS and Android devices there are very few options. Arguably one of the best is Nomad Sculpt as not only does it let us create and paint 3D models, but also it has many lighting, camera and post-processing options for making beautiful renders. However, unlike software such as Blender, Nomad has little support for creating planes with image textures, which are handy for quickly adding assets to render richer scenes. In fact, when I imported a plane with an image texture, created in Blender, Nomad would import it but not let me trim it. So I decided to look into how we can use Python to create textured boxes from images, saved as Wavefront OBJ files (see Wikipedia) that Nomad can easily read, and runnable on phones, tablets and PCs.
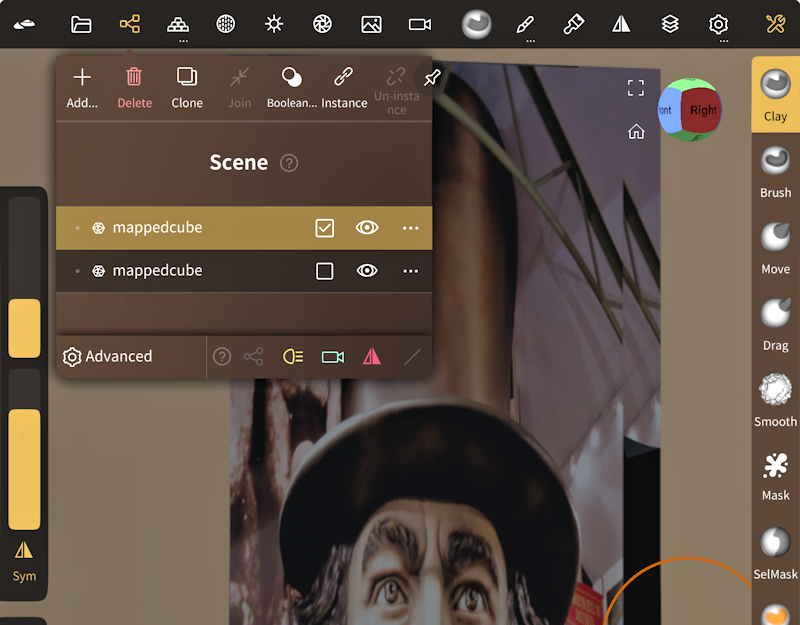
You can get the Python 3 code from the Parth3D Github repository and it works just as well on PyDroid3 (on Android) and Pythonista (on iOS) as with regular Python 3 on a PC. To run it you just need to change the filename in the code to the name of your image file. Then run something like ‘python cubemapper.py’ in your terminal and the code will output Wavefront OBJ and MTL files with the same name as the image. If you go into Nomad Sculpt you can import that 3D model, just make sure you select the OBJ, MTL and image files together. But when I first did that I found that Nomad would make two objects, like in the screenshot below, one for the texture image and one for the cube itself. And it would only let me trim the cube part, not the textured faces!
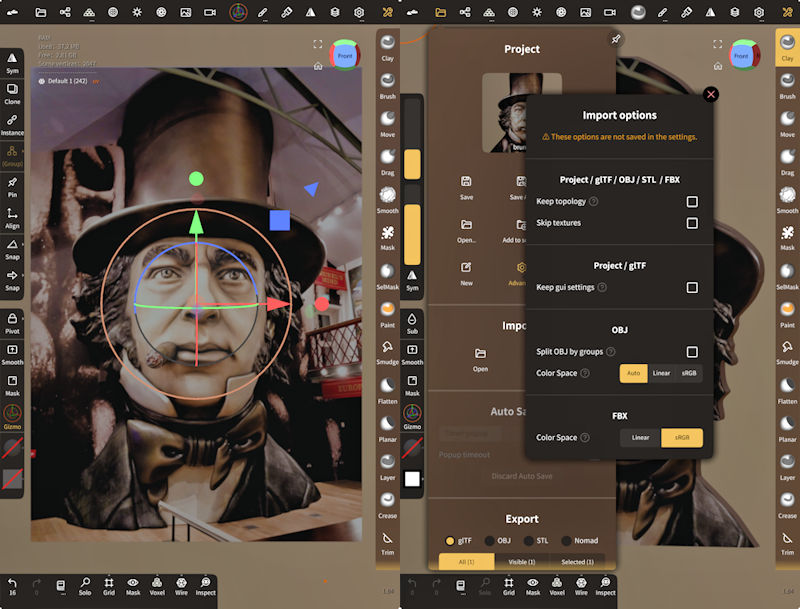
Now it turns out that Nomad was splitting the model into one part for each of the textures baked into the 3D model, probably just to keep the image as a separate undeditable mesh. So I changed the code so that the sides of the cube were also mapped to the texture image, just all at one pixel in the bottom right. Having done that I was able to import the 3D model files as one item. You can see that in the screenshot below, together with my import settings (under ‘Advanced’ in the file menu) in case that helps you. If you want to explore that issue further, and have a plain black material for the sides instead, you can set the ‘onlyimtex’ parameter in the code to False.
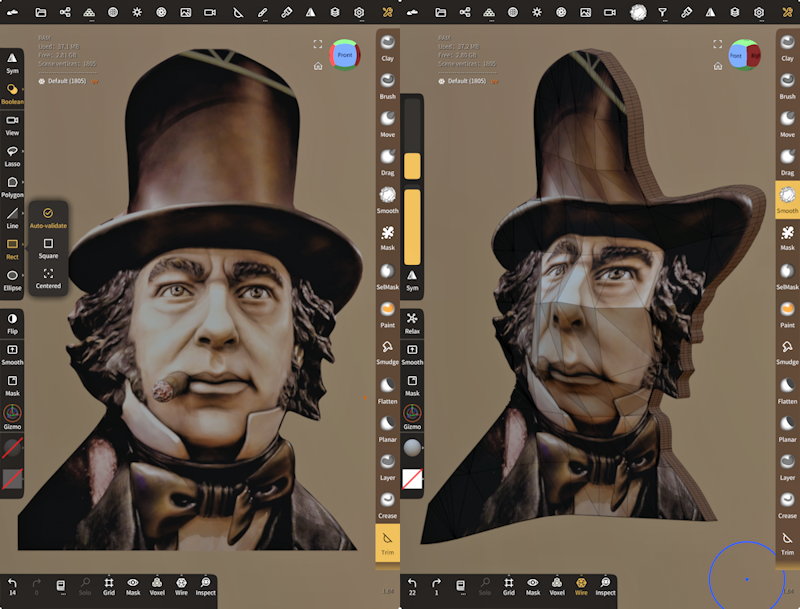
Unfortunately, you can’t currently do things like voxel remeshing on the imported image cube, because the image isn’t colour-by-pixel so the colours will be lost. However, you can use subdivision to increase the number of vertices and triangles, and decimation to reduce them if you need to. Most importantly though, you can now use the trim tool to cut away areas you don’t want to see in your 3D renders (or split to separate items out of the image). You can even do things like sculpting with the clay brush, or use the drag and move brushes to change the shape. Examples are shown in the screenshots below.
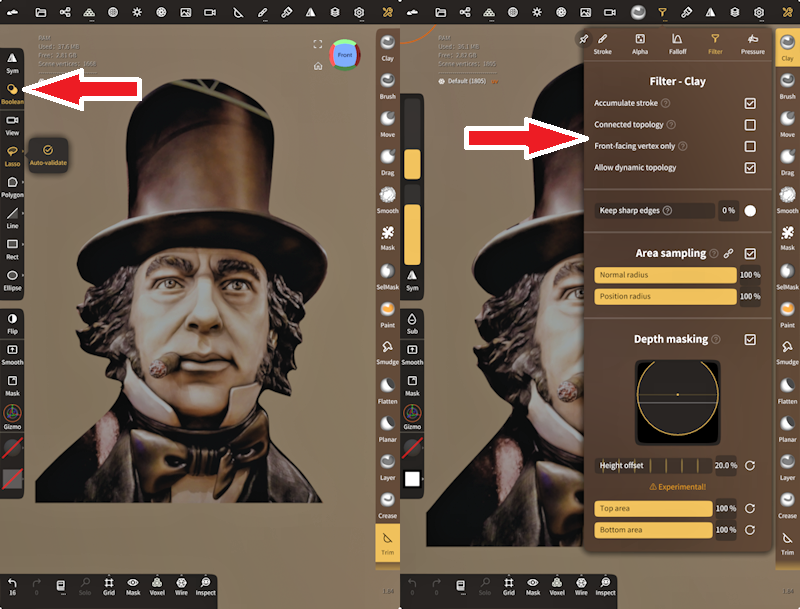
However, given the limitations in remeshing, you may want to change the parameters (at the end of the code, just before the image file name) to give you a higher vertex count, if you’re sculpting. And there are a couple of other things I should also mention that can help. The first is that I’ve found using the lasso in the trim tool, on the image cubes, can leave strange white artifacts cutting into remaining pixels. If you get that I’ve found that turning off the trim tool boolean option can help, as on the left screenshot below. Secondly, you probably don’t want your image cube too thick so the edges don’t show in renders. But if you sculpt a thin object in Nomad it can go through the back faces, which we can’t remesh. If that’s a problem for you, you can use the filter options for tools like clay, as in the right screenshot.
Having said all that I can now have fun adding image cubes into Nomad Sculpt and using them as quick 3D resources for making my renders richer and more interesting. For some scenes it may also help reduce compositing as I can more easily add scenery to the backgrounds. But whatever we use it for, I hope you go visit the excellent SS Great Britain in Bristol, where I took my example photo of Brunel 🙂


