The height of VR frenzy may be over, but that doesn’t mean hardcore 360-degree image fans can’t still enjoy the technology. And for stereo-photo fans especially, there’s an extra bonus: photos taken with the Google Cardboard Camera app can be viewed as 3D images. And if you read my recent blog post about analysing 3D photos, with the Python 3 Photos3D library, you’ll know that a basic knowledge of JPEG-based image structure lets us do some exciting things: including extracting the second, stereo, view from our Cardboard images.
And to illustrate how to do just that in Python you can head to the Photos3D repo on Github and look at cardsplit.py. If you look at the sample Cardboard image (classroom.vr.jpg) in most apps you’ll just see a single image, but run ‘python cardsplit.py‘ in your teminal and you’ll see it displays two different images, one for the left, and one for the right view. If you just want to split the two views from a Cardboard image, and even join parts together to make a 3D stereo-pair, cardsplt.py will do all that. But if you’d like to know more about how it works I’ve put some details below.
The reason we can see two images is explained using the jpegdump.py Photos3D example from my last post (click here if you need a look). Running it for our sample Cardboard image gives us the info below. On the whole it looks a lot like a normal JPEG image file, and it has EXIF and XMP application-specific sections in markers 1 and 2 respectively (as you’ll see at the bottom of the jpegdump.py listing in a terminal).
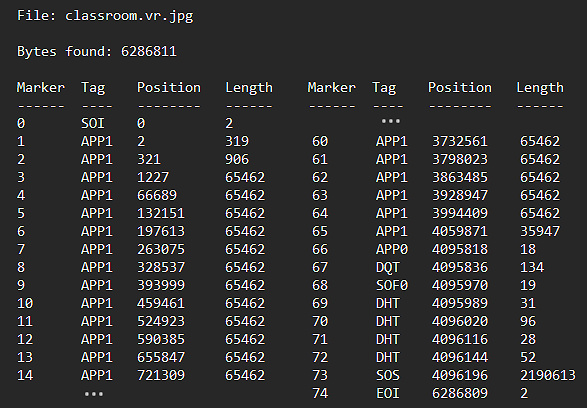
Now the interesting thing you’ll notice about the image structure is that it has loads of extra APP1 sections. In fact, markers 3 through 65, inclusive, are what we call extended XMP data. It’s a method developed to add large amounts of data (greater than 64kb) to a file using lots of smaller sections (each <= 64kb). Of course, it was developed years ago when people hadn’t really expected anyone to need to embed large amounts of metadata, but it’s still widely used. And while Google could have used a much simpler format (like MPO) for Cardboard images, it chose extended XMP instead. So the Photos3D jpegtool library module includes code to take all of the extended XMP APP sections, extract the data from each, order all the sections, join them together and convert them to binary data which it then converts to an image.
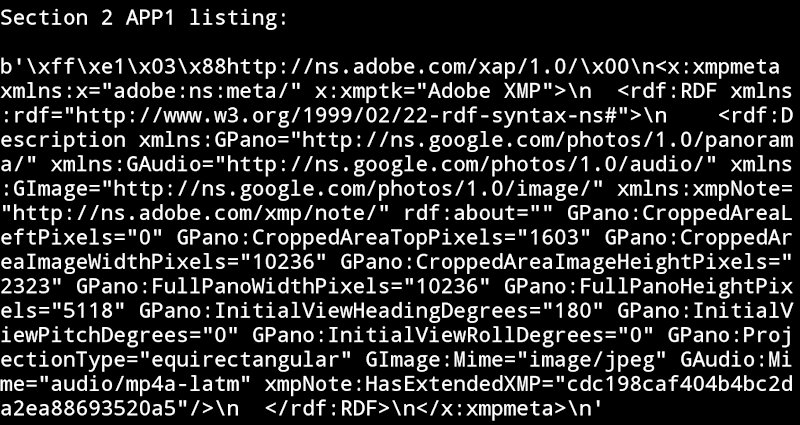
If you want to know about the technical details of how that’s achieved in pure Python you can delve into the jpegtool library code. But probably of more interest right now is that XMP section we found at marker 2, which is very useful to us as it contains Cardboard-image-specific data. You can use the jpegdump.py script to extract it and print it out, and I’ve put that for the sample vr.jpg file below. To make life much easier for us it’s actually just plain ANSII text, XML formatted, so you can easily extract all of the relevant variables in Python or even just a text editor.
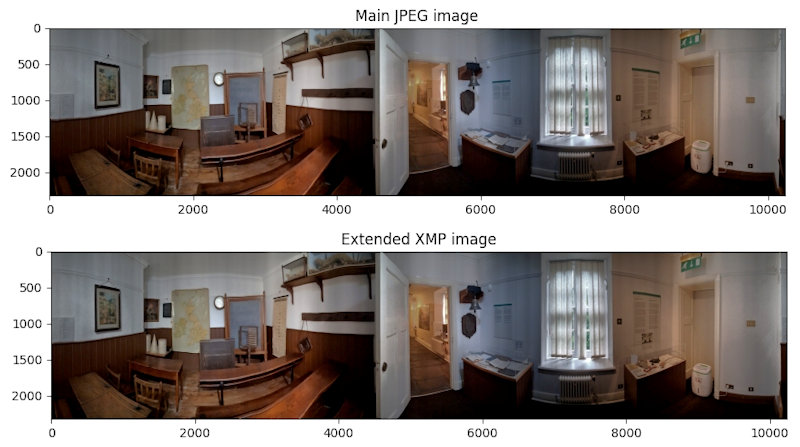
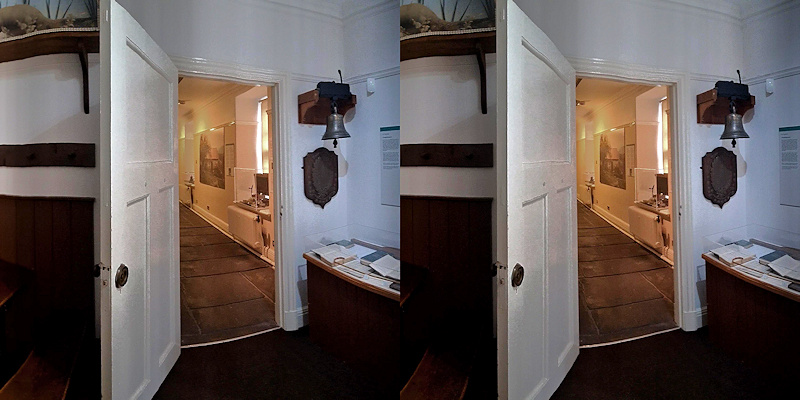
Finally, I should also explain that the main JPEG image in the Cardboard file is the left view, and the one embedded in extended-XMP is the right view. So using the Photos3D SBS (side-by-side), and image, library modules I was able to create a stereo image pair for the centre of each view. And cardsplit.py includes the code for doing that and you should be able to easily extend it to view stereo pairs for any direction around the 360-degree views. Below is how the middle turned out in 3D.
So we can easily extract the second view, and relevant metadata, from a Cardboard image file and use it to make stereo-pair side-by-side (or even anaglyph) 3D photos using the Photos3D Python 3 library. And I hope you found it interesting and that it inspired you to improve on the sample code to do some truly inspirational 3D photo thingies 🙂


