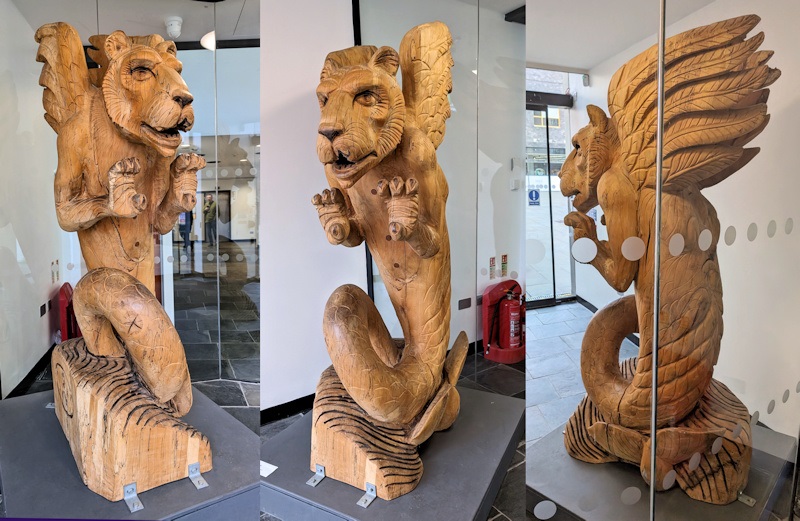
Griffins have been around for millennia, their importance grounded in them being a cross between the lion king of the beasts and the eagle king of the skies (see Wikipedia). So obviously a city as important as Newport, in south Wales, must have one. And in this case it’s the amazing chainsaw carved Newport Griffin, by local artist Chris Wood, which can be found in the city’s library, museum and art gallery building. Being such a wonderful and expressive piece of art I just had to pay a visit so I could make my own 3D printed fan art version.
Quick summary of this 3D creation
Overview: A 3D scan of a timber chainsaw-carved griffin by Chris Wood.
Location: Newport Library, south Wales [map].
Date/era: Modern.
Software used: Luma Labs AI, Nomad Sculpt, Blender.
Intended use: 3D printing with minimal support material.
Download: Thingiverse page (non-commercial license).
Originally I did a 3D scan using Kiri Engine. That came out really well with lots of detail but, with walls around the rear and one side, it didn’t manage to fully recreate the wings and back. So I tried using LumaLabsAI with the 196 12mp smartphone photos I’d taken. The result was a much more complete model, with almost complete wings. However, it had little of the fine detail of the Kiri Engine model, which for a fan art version, for FDM 3D printing, is actually a good thing.
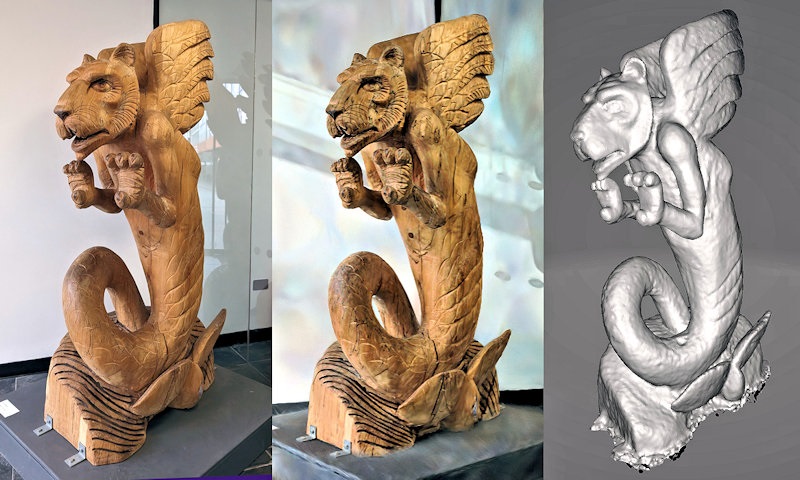
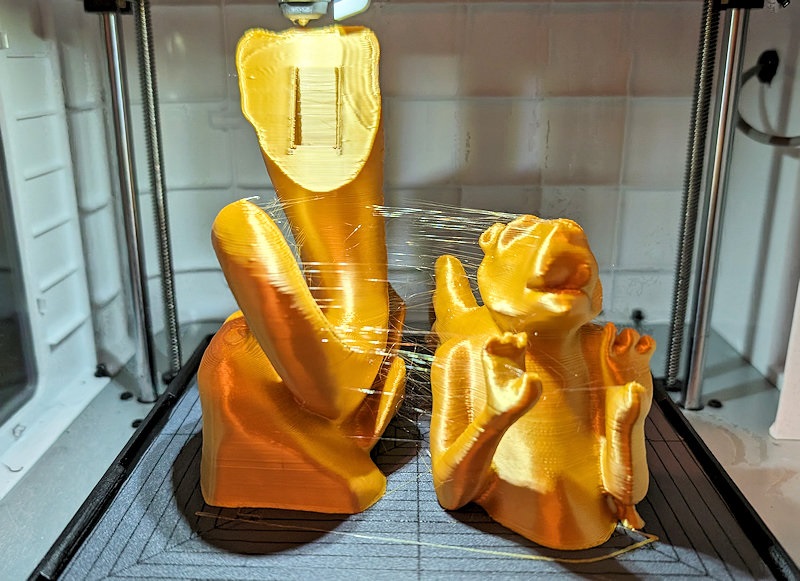
I loaded the LumaLabsAI model into NomadSculpt to solidify it, to trim away unwanted material and to clean away scan artefacts. I also did a little light sculpting to reduce the need for support material in a few places, then sliced the model into two parts. Then I loaded it into Blender where It was decimated and holes added to insert a link bar into when glueing. Then I rotated the top part so the mouth and face point upwards, so that support material can’t ruin the Griffin’s mighty good looks. Printing was then quite straightforward at maximum scaling, with hardly any supports needed.
Having cleaned up the print, with a little filing of lower edges, the assembly was very simple. The link bar just needs inserting into the hole in the bottom piece, and the top piece simply slides onto that. I used some two part epoxy glue to hold it all together. Below is a photo so you can see the results from all around. I think the join isn’t too obvious unless you get close, but for a proper job the seam would need trimming and sealing, before priming and painting.
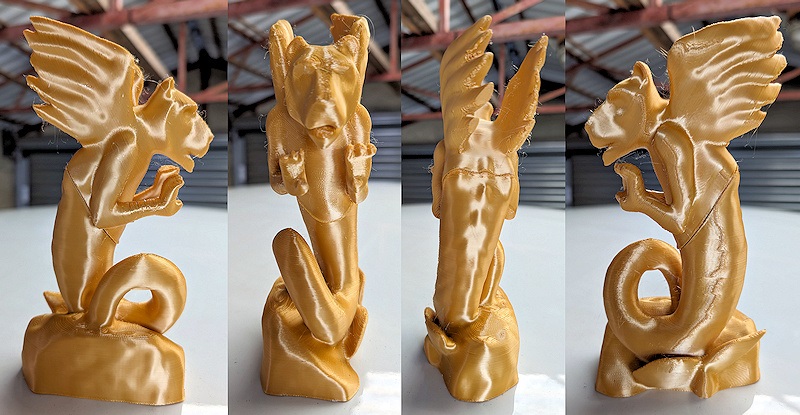
Finally, I hope you find yourself a fan of this wonderful work by Chris Wood and decide to make your own fan art 3D print of it – either as a reminder of your visit to see it or as a reminder to pop along to Newport to discover it for yourself 🙂

