Sheffield has such a long industrial tradition that it’s often appropriately known as Steel City. According to the History UK website, Sheffield cutlery was first mentioned in Chaucer’s Canterbury Tales, dating that industry to at least the late 1300s. So it’s likely of little surprise to you that Sheffield also has some excellent works of public art commemorating their industrial past. But Sheffield also suffered terribly in the Second World War, being bombed a number of times by the German Luftwaffe, causing much damage and loss of life. And, during those long war years, the loss of labour to the armed forces left a large gap in the steel industry labour force that could have brought steel production to its knees. So, it’s very fitting that one of Sheffield City Centre’s best pieces of public art depicts the role that the women of the city played in preventing that disaster: the Women of Steel sculpture.
Quick summary of this 3D creation
Overview: A 3D sculpted basic scan of the ‘Women of Steel’ sculpture in Sheffield city centre, commemorating the role women played in keeping the steel industry operating during the Second World War.
Location: Sheffield City Hall, Sheffield, England, United Kingdom [map].
Date/era: Modern, 2016.
Software used: Sony 3DCreator Android app, Nomad Sculpt, Meshmixer, Blender.
Intended use: 3D printing, preferably in resin to preserve detail.
Download: MyMiniFactory page.
Nearby: Thomas Boulsover sculpture, Weston Park carving.
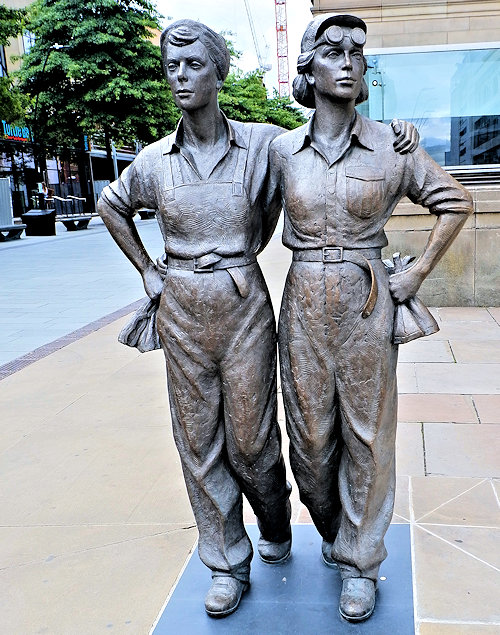
Although I’ve previously made models of the heads of the wonderful Women of Steel sculpture, this is a model of the whole artwork that can be found right in front of Sheffield City Hall, in Sheffield city centre, in the UK. The sculpture was designed and sculpted by Martin Jennings and was unveiled in June 2016, subsequently winning a number of important awards in the art and public monuments world (see the Women of Steel Wikipedia page for more details). It is intended to celebrate the importance of women in the Sheffield steel industry, especially during the world wars when the industry would have ground to a halt without them.
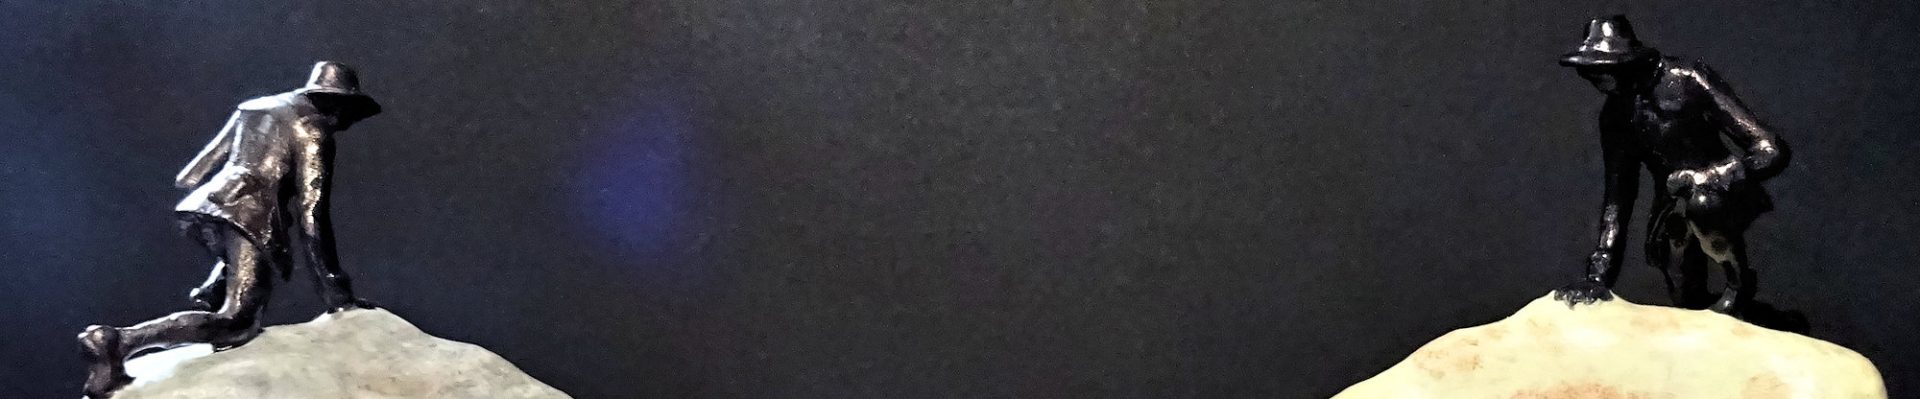
The scan was made, during the summer of 2018, in three parts using the Sony 3DCreator app on a Sony Xperia XZ2 smartphone: one of the left head, one of the right head and one of the two bodies together. The heads were fairly easy to scan, being around life-size and with quite a bit of detail. I won’t talk about them here as you can read about them on my other pages (click here to see the left head, or here to see the right head).
The body, on the other hand, was much more difficult. The size and shininess of the metal surfaces was much more challenging for 3DCreator, especially the base of the legs which have less detail, and the thin lower arms. So some 3D sculpting was needed to create the full model, which I did using Nomad Sculpt on an Android tablet. You can see the starting point for the sculpting in the screenshot below, illustrating how much reconstructive surgery it needed.

As the tablet has a pressure sensitive stylus I was able to easily sculpt away excess ‘material’ on the legs, getting the model to look much more like the original with the help of some reference photos. Of course, I have to say that the sculpting does mean that the model cannot be considered an exact replica of the original work. However, for most purposes I don’t think that’s much of an issue: the model is intended for displaying at a small size to celebrate the Women of Steel sculpture, so not being an exact likeness wasn’t an issue for me. Also, it highlights that 3D scanning and digital sculpting are actually complimetary techniques, rather than separate disciplines.
Nomad Sculpt was also used to merge the heads onto the bodies, the size and position being set based on the minimal head material in the full body scan. I also merged a cylinder into the missing part of one of the arms, and sculpted over it, to repair that damage in the scan, using the clay and smooth brushes. Then, because 3DCreator tends to smooth out sharp details, I used the crease tool set to a small radius to sharpen up the edges of important details. On a PC, the scanned model was then post-processed using Meshmixer to remove extraneous areas and to remesh to a sensible file size. Finally, Blender was used to add a new base. You can see the finished model, after all that work, on Sketchfab below (click the play button to load the model and view it in 3D).
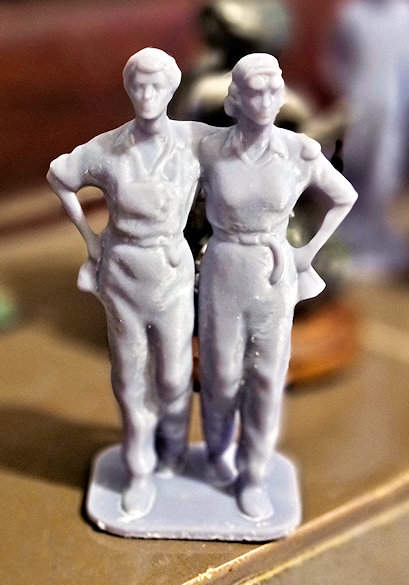
Given there’s a fair amount of detail in the model, I decided fused-filament printing wouldn’t do it justice, at least at a sensible size (in this case 70mm high) suitable for displaying on a shelf. So instead I decided to print it using resin in the new Anycubic Photon Mono SE printer I bought to replace my old Monoprice SLA printer, after it decided to give up the ghost. You can see the result in the photo below, which I think came out quite well: the printer seems very good for a cheap Black Friday deal and prints much quicker due to the monochrome LCD it uses. And because I live in a small apartment, I used Elegoo water-washable resin. I think the details would have been sharper with ‘normal’ resin, but the water-washable variety produces much less in the way of obnoxious fumes, plus it’s much easier to clean away uncured resin after printing.
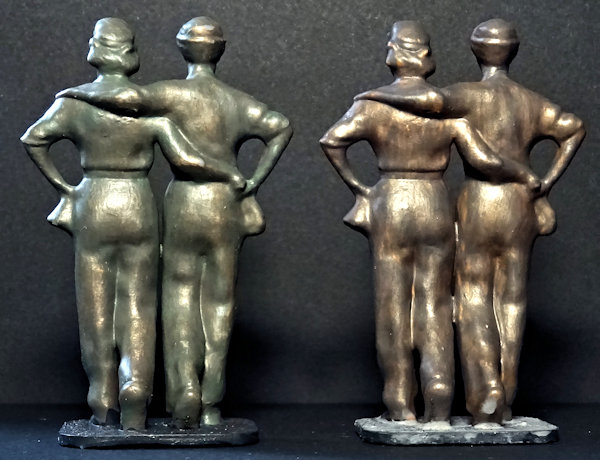
After a bit of work removing excess resin that survived the initial washing and UV curing, I gave the models a coat of The Army Painter brush-on primer, to help ensure later paint coats would adhere well. After that I wanted to try to create a bronze effect to match the original work, which can be difficult with a small scale model. So, I decided to try two methods, as shown in the photo below.
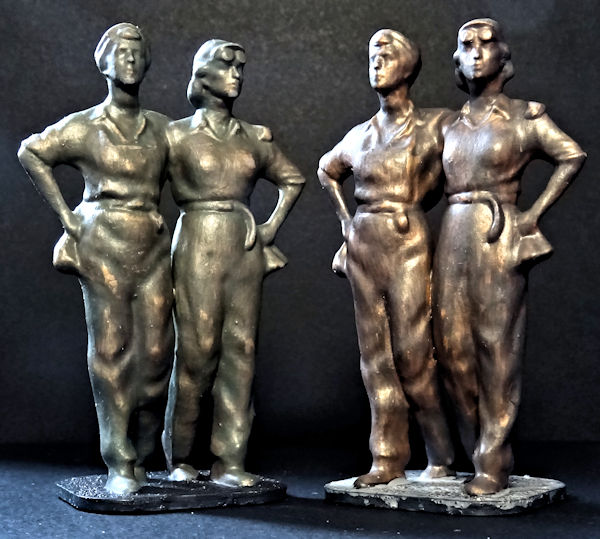
The version on the left was first painted with Humbrol metallic bronze paint. It tends to give a good bronze effect, but can be a bit dark for small models, and the metallic effect can sometimes be a bit over the top in my opinion. However, I’ve found that a diluted wash containing green paint can improve the effect when painted over it. So here I used some The Army Painter green and grey, with their wash medium, to tone down the Humbrol paint effect. With the wash well diluted it doesn’t obliterate the bronze below, just giving a slightly dark green-ish tint. And if you want to see what the back came out like, here’s a photo of that too.
I was quite happy with the result but also wanted to try out some new The Army Painter weapons-bronze I’d recently bought, which is how the version on the right was finished. Obviously that would be much too bright for this model, so I used diluted weapons-bronze with some dirty cape and necromancer cloak, painted thinly over the top, to tone it down. The wash was then easily rubbed off with some strong paper kitchen towel, and a microfibre cloth, to bring out the brighter metal effect around details. Both versions were then finished with a coat of Citadel Stormshield clear-coat to reduce shininess. Personally I think the weapons bronze version was the nicer result for this model, but both methods will have uses for me in future projects.
So finally, in case you’d like to use the methods in this project for your own work, let’s recap on what was involved:
- The Sony 3DCreator Android app was used to create basic 3D scans on a smartphone, which provided a good representation albeit with loss of some sharp details.
- Three scans were made: one for each head to get good detail in them, and one for the rest of the sculpture.
- Nomad Sculpt was used on an Android tablet to remove excess digital material, repair scan defects, merge the three scans and sharpen edges.
- On a PC Meshmixer was used to solidify/remesh the model to achieve a much smaller file size without losing too much detail.
- Blender, also on a PC, was used to add a new base.
- The finished 3D model was then test printed in resin, and found to print to an acceptable quality.
- The test prints were then painted to give two different bronze-effect finishes.
- Due to the amount of detail in the final model, fused-filament printing is probably best avoided unless printing to a large scale.
Please note that this scan is provided without any license for commercial use. It is intended simply as a model you can have the fun of printing yourself. And of course it is intended to be a motivation for you to visit Sheffield, soaking up the culture and history while popping over to Sheffield City Hall to view the wonderful Women of Steel sculpture: click here to see the location in Google Maps.


