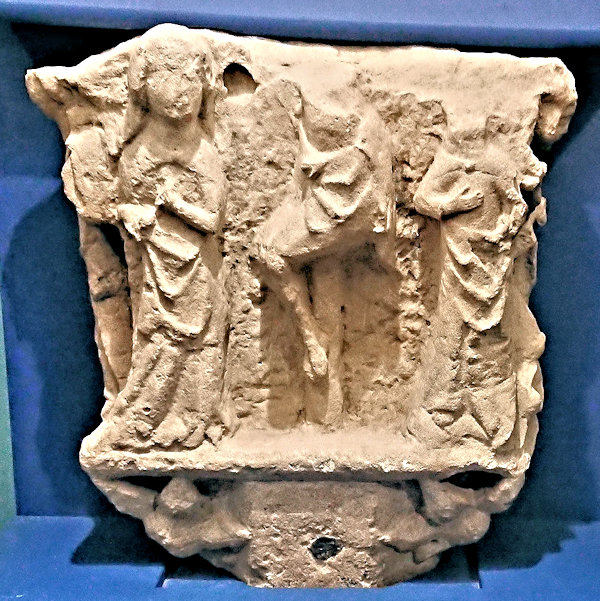
If you’ve looked at my post about scanning the bust of John Frost, you’ll know that the museum in Newport has some excellent exhibits. One of them is the old carved stone preaching cross, which I decided to scan while visiting the excellent Newport Museum and Art Gallery just off John Frost Square in Newport, South Wales. The sign states ‘Wayside, or Preaching Cross, representing The Crucifixion, found during the construction of the present Newport Bridge, around 1926. The Cross is thought to date from between 1450 and 1500.‘ It’s a wonderful artefact, of great cultural and religious significance, that has unfortunately obviously suffered greatly from the ravages of time. So, as you might expect, I decided it would make an excellent opportunity to do a 3D scan and add a 3D print of it to my collection of historic items.
Quick summary of this 3D creation
Overview: A basic scan of the carved stone Preaching Cross in Newport Museum and Art Gallery.
Location: Newport Museum and Art Gallery, Newport, South Wales, United Kingdom [map].
Date/era: Thought to be between 1450 and 1500.
Software used: Sony 3DCreator Android app, Meshmixer.
Intended use: 3D printing, either in resin or fused filament, the latter being possible without support material.
The scan was made with the Sony 3D Creator app on an Xperia XZ1 Compact smartphone. Fortunately, the exhibit was set at chest height with good lighting, so it was easy to get to, and move the camera around, to get a complete scan. Using 3DCreator obviously means the scan doesn’t contain small details, largely because the carving has limited surface texture for use with photogrammetry scanning methods. But overall 3DCreator did do a very good job of representing the shape and form as a record of the object for posterity. And, given that 3DCreator is provided free by Sony, and is easy and quick to use, I don’t really think I can complain, especially as the result was definitely good enough for me to make a nice 3D print to display.
The scan was then post-processed using Meshmixer to remove extraneous areas and to remesh to a sensible file size for speed of use in the Sketchfab viewer, as well as to allow speedy downloads. The solidify tool was used for that, with the sharp edge preserving setting allowing a sensible file size with minimal loss of the limited detail contained in the original scan. If I’d done the scanning more recently, I think I would also have used Nomad Sculpt, before Meshmixer, as the pressure-sensitive tools (when used with a tablet computer with a pen/stylus) would allow for much better sharpening around the edges of features (using the crease tool with a small radius). You can see the finished model on Sketchfab below (click the play button to load the model and view it in 3D).
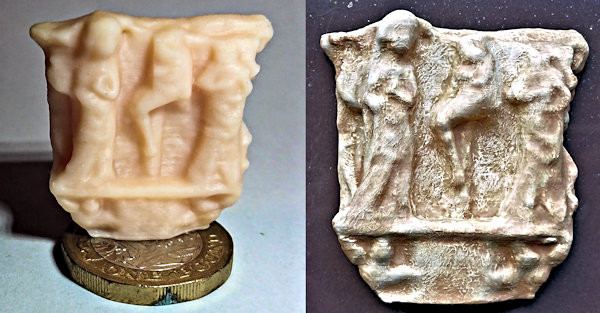
Finished 3D prints of the Preaching Cross can be seen in the photo below. The one on the left was printed using standard photo-curing resin on a Monoprice Mini SLA printer, which provided good detail even given the very small size. However, given the minimal detail, and the lack of sharp overhangs that would require suport material use, I decided that I would also try it using a fused-filament printer. So, the version on the right was printed in PLA using a Monoprice Mini printer. The results, at around three times the size of the resin version, were actually quite pleasing, and illustrate that this model is equally suitable for both types of 3D printing. My feeling is therefore that choice of printing method is just a case of what equipment you have and how small a print you need. If you want to try 3D printing it yourself, click here to go to the MyMiniFactory page to download it.
The PLA print was painted using Pebeo craft acrylics, with washes added at increasing dilutions, to give a stone effect. It was then given a protective coat of matt varnish that had the added advantage of controlling shininess. Craft acrylics are quite thick, so they caused some loss of detail, although I won’t be viewing it very closely so was quite happy with the result. I also later painted the resin version in the same way. Thinner paints (such as The Army Painter or Citadel ones) could have been a better option as resin layer lines are very fine and so easier to hide with thinner paints. Also, in combination with their wash mediums, they can be used to get some very nice stone effects (for example, see my scan of the pilgrim sculpture in Droitwich Spa). But overall I was quite pleased with the result, and I think it turned out well.
So finally, in case you’d like to use the methods in this project for your own work, let’s recap on what was involved:
- The Sony 3DCreator Android app was used to create a basic 3D scan on a smartphone, which provided a good representation albeit with loss of sharp edge details.
- On a PC Meshmixer was used to cut away unwanted material and solidify/remesh the model to achieve a much smaller file size.
- The finished 3D model was then test printed in resin and PLA, both being found to print to an acceptable quality.
- As there isn’t an enormous amount of detail in the bust, resin printing need not be considered the best way to make this model.
Please note that this scan is provided without any license for commercial use. It is intended simply as a historical model you can have the fun of printing yourself that advertises this old carving. And of course it is intended to be a motivation for you to visit Newport Museum and Art Gallery yourself to view this wonderful old piece of Newport history: click here to see the location in Google Maps.


