One of the amazing things in modern versions of Blender is the ability to make 3D renders of 3D scenes. And gone are the days of having to create two 2D cameras, one for each eye. Now we can set a normal Blender camera to do stereoscopic rendering. It’s not difficult, if you understand the basics of 3D photography. But, it is a little fiddly if you haven’t done it before, so I thought I’d do a quick post about how to get started making a side-by-side 3D render. And first you’ll need a simple scene in Blender like in the screenshot below (which is from Blender version 3.3.1), with Eevee set as the renderer.
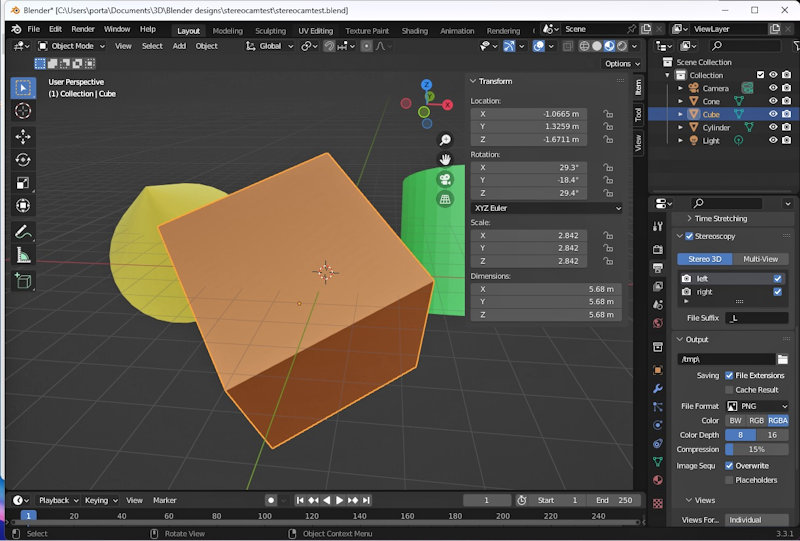
To keep things simple it’s easiest to use dimensions that are similar to a real world scene, as that makes the process easier to understand. So, you’ll notice in the screenshot that the main cube is around 5m on each side, which means the camera can be a few metres away just like if you were taking a stereoscopic photo. You’ll probably find things easiest if you place your camera at 0m for the x and z axes, and around -5m for the y axis, with the only rotation being 90º on the x axis. Then you can press 0 on your numpad to get into camera preview and, with the camera selected, grab and move until you get a good view of the scene.
Once you have the camera in a good position and still selected you’ll need to change the settings to get a stereo render (if you have more than one camera ensure the stereo one is active for rendering). The settings are in two places which makes things a bit complicated until you get used to it: the ‘output properties‘ and ‘object data properties‘ tabs on the right of the Blender window, which I’ve outlined in red in the screenshot below. In ‘output properties‘ find the stereoscopy section and tick the checkbox. Then you can choose ‘stereo 3D‘ and under ‘views‘ choose ‘stereo 3D‘ again and ‘side-by-side‘. Obviously you can play about with those choices later, but they’re OK for now.
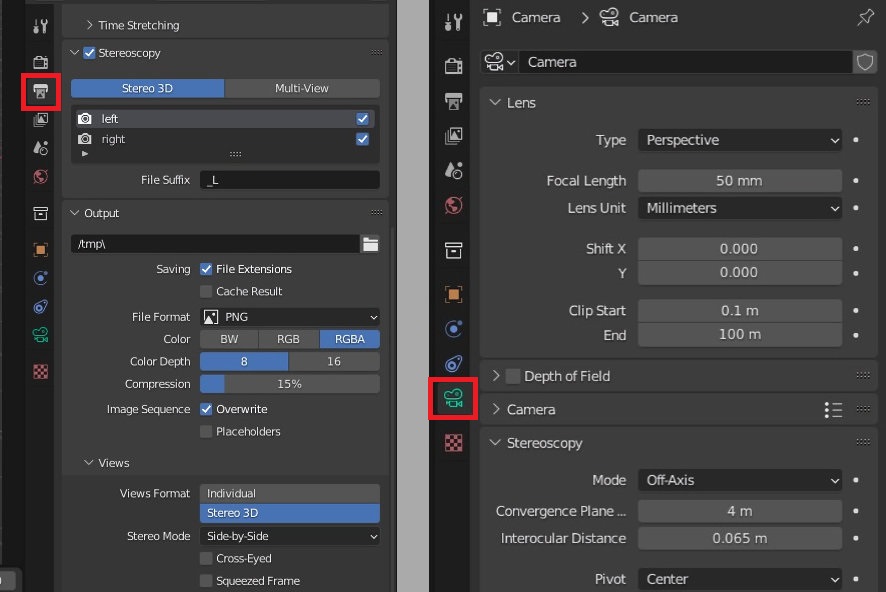
To get a quick 3D render for learning, the ‘object data properties‘ tab isn’t essential as we made a scene with sensible real-world dimensions. So we could ignore it and go straight to rendering. However, it’ll become more important for most scenes so the main thing to notice is there’s a ‘stereoscopy‘ section under this tab too. It has some options we can play with later, but the convergence and interocular distance settings are quite important. Interocular means between the eyes and is the seperation between the left and right view positions. 0.065m is the usual distance for average humans, but if you don’t want to be average you can increase it for greater 3D effect, or to suit the dimensions of your scene.
The convergence distance is how far away your eyes are looking when they are focussing on something in front of you. So here it means that if you drew a line out from the left and right camera views they would intersect that distance away. To emulate what our eyes do it’s best to start with convergence at a distance equal to how far the camera is from the main object of interest. So above you see I set it to 4m as that means convergence is around the front of the cube. It’s important to remember that these two distances are very important to 3D viewing comfort so, unless you enjoy people vomitting over your computer, it’s probably best to try to emulate normal human viewing. And having said that, we can now head off to the render menu and render an image, which will bring up a window like the one below.
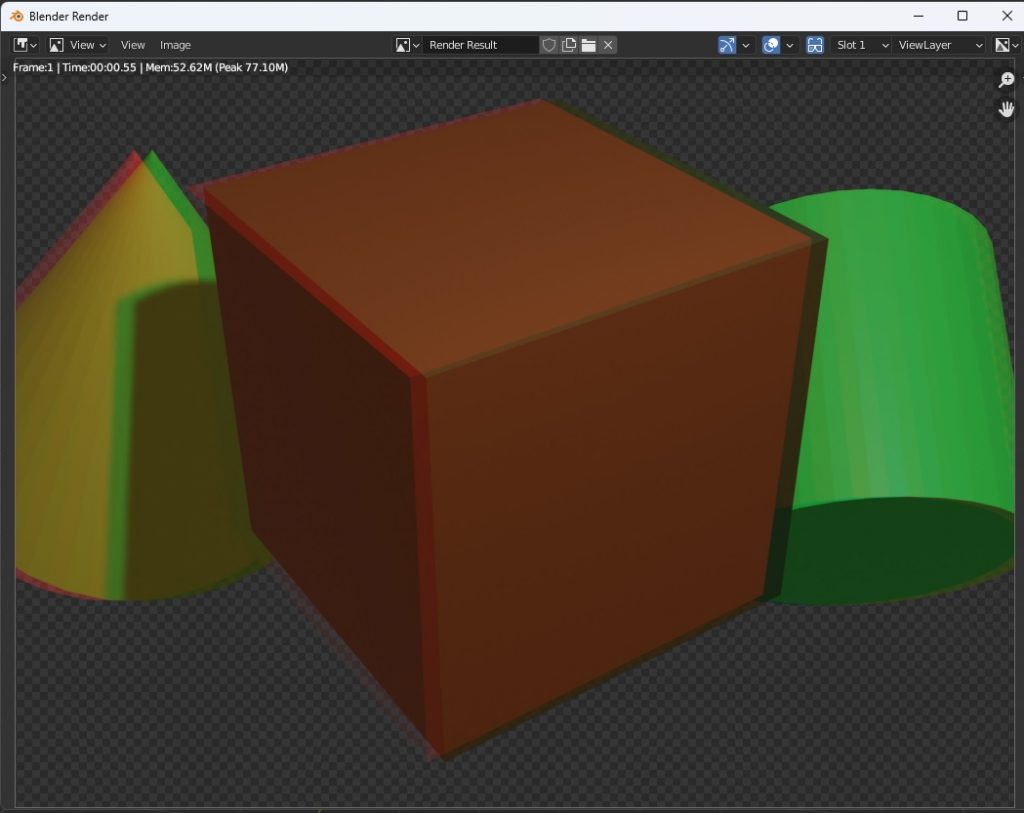
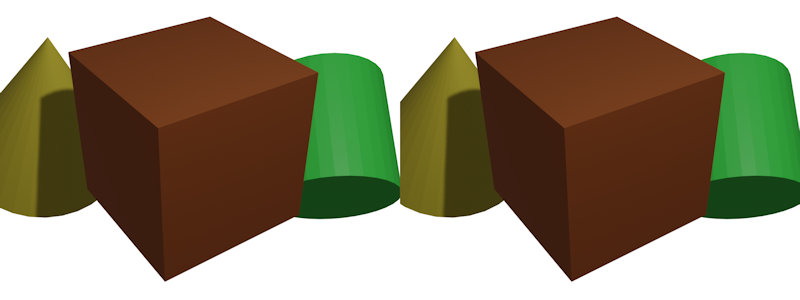
The rendering will take a bit longer than usual as there’s two views to do. And as you see above, it will look suspiciously like an anaglyph image rather than side-by-side views. In fact, you can change the setting to get an anaglyph render, and the render window will look just the same. Don’t worry though, just use the image menu and save it to your computer. Then, when you open the image you should see a lovely side-by-side stereoscopic 3D version of your scene. I’ve put an example from my rendering below: if you’re adventurous you should be able to see the scene in 3D by crossing your eyes and squinting.
So there we are, with just a little work we’ve created a 3D rendered image in Blender. And there are quite a few options in the settings to play with like getting seperate left/right images and making anaglyph renders. Personally, for most scenerios, I think just getting a side-by-side render is best as I can use Python to post-process and composite, then make an anaglyph if I want one. However, whatever works best for you is best and I hope whatever that is is made more enjoyable by knowing how to get started with Blender stereoscopic 3D rendering 🙂


