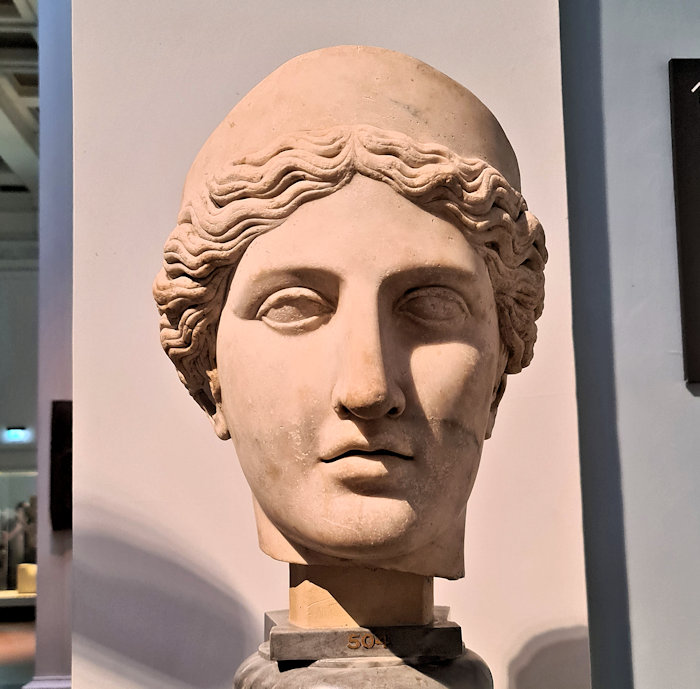
Sometimes it seems that modern sculptures based on the ancient Greek style are ubiquitous. So it’s not surprising that the Romans also liked to decorate their homes and public spaces with replicas of older Greek sculptures too. When I visited the British Museum recently I found this lovely example: the head of a colossal Olympian Goddess from Agrigento, Sicily. Apparently the Romans copied it from a Greek original of about 420 BC, which I suppose was old even in those days. One of the things I like about is that the sculptor obviously knew how to get the best effect from a head that would have towered over viewers: for example, looking from the side the eyes have been rotated downwards to look at you. It’s an incredible piece and one I couldn’t resist adding to my collection.
Quick summary of this 3D creation
Overview: A basic scan of the Roman marble head of an Olympian Goddess (possibly Demeter or Hera).
Location: British Museum, London [map].
Date/era: Roman, 30-180 AD.
Reference: GR 1873.0820.740.
Software used: Sony 3DCreator, Nomad Sculpt, Meshmixer, Meshlab, Blender.
Intended use: 3D printing of a miniature model.
Download: MyMiniFactory page.
According to the information board ‘The size of this head suggests that it was originally part of a colossal cult statue in a temple, possibly representing the Olympian goddesses Demeter or Hera. It was discovered at Agrigento, one of the wealthiest cities in the Mediterranean region during the Greek and Roman periods. Although the statue would have been produced for a Roman context, the style of this head is influenced by Greek works made around 430-420 BC‘.
The scan was made with the Sony 3DCreator app on an Xperia XZ2 smartphone. Even though Sony seem to have abandoned 3D Creator, it’s still arguably the best smartphone method for guerilla-style 3D scanning, taking little time to create a very usable textured mesh. And for this project it did a very good job, needing little editing apart from some smoothing due to the limited detail in the original stone surfaces making photogrammetry difficult. Blender and Meshlab were then used to create a colour-by-vertex GLTF file for loading into Nomad Sculpt on an Android tablet.
Nomad was used to tidy up some defects in the scan, and trim off excess ‘material’. The main trimming needed was at the back and top of the head, which were too high to reach when scanning. So I tried to just make those areas look fairly natural as they won’t show when displaying a print. The resulting file was then re-meshed in Meshmixer (using the sharp edge preserving mode) and scaled to a sensible size: I chose 50mm high as it’s a good size for displaying, but there’s enough detail to create a much bigger version. You can see the result of all that work on Sketchfab below (click the play button to load the model and view it in 3D).
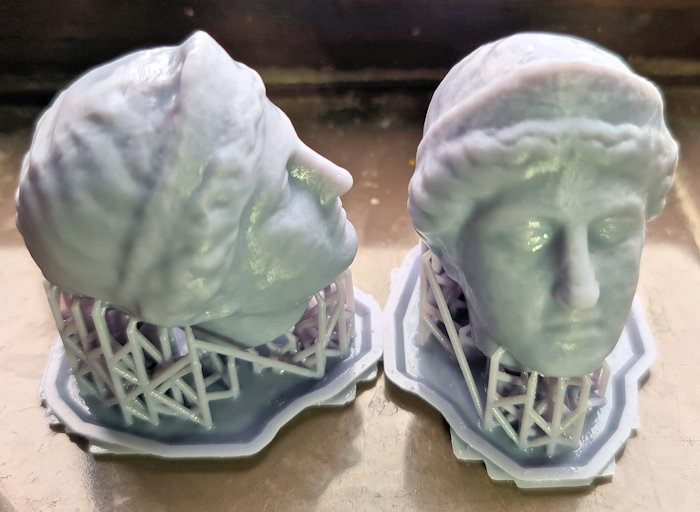
Because I wanted a miniature that retained plenty of detail, I printed the portrait in my Anycubic Photon Mono SE SLA printer, using Elegoo water-washable UV-cured resin. So first I loaded the model into Meshmixer on my PC, and used the hollow tool with a wall thickness of 2mm. Then I created a hole in the bottom using the meshmixing and constructive solid geometry tools. That meant I only had to use a fraction of the resin I would have needed if I had printed the model solid. Also, I printed it at an angle to avoid support material spoiling the face. You can see the results of the printing (at 50mm high) in the photo below.
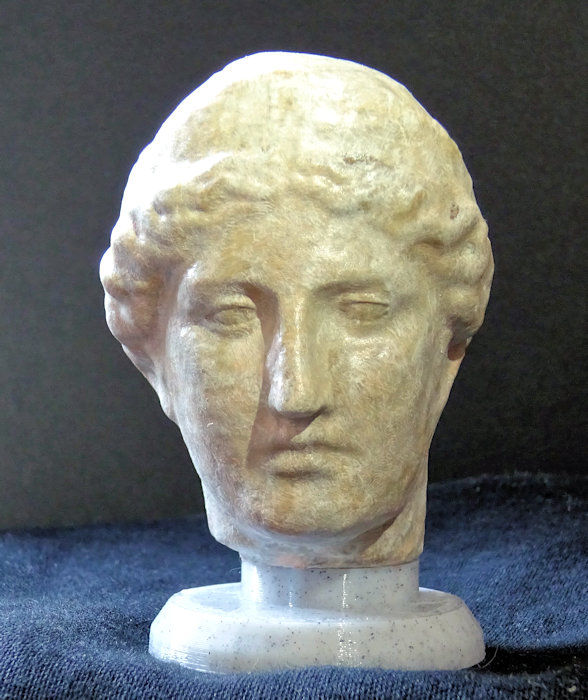
I decided to paint the print using The Army Painter paints, starting with a coat of their brush-on primer. Then I mixed and applied some Arid Earth with a bit of Tanned Flesh, the latter adding a slight redness similar to the original. Once that dried I decided to use a little of their Soft Tone wash, which pooled around sharp edges, like around the eyes, helping to highlight them. I decided to go for a white marble look, rather than replicate the red of the original, so I then diluted some Arid Earth and Matt White using wash-medium, stippling it on thinly. And after a coat of Citadel Technical Stormshield the result is shown in the photo below.
So finally, in case you’d like to use the methods in this project for your own work, let’s recap on what was involved:
- The Sony 3DCreator Android app was used to create a basic 3D scan on a smartphone.
- Meshlab and Blender were used to create an initial color-by-vertex GLTF file from the scan.
- Nomad Sculpt was used on an Android tablet to remove excess digital material and repair scan defects.
- On a PC Meshmixer was used to rotate, scale and translate the model.
- The finished 3D model was then test printed in resin, and found to print to an acceptable quality.
- The resin print was then painted using The Army Painter paints.
Please note that this scan is provided without any license for commercial use. It is intended simply as a model of an ancient artefact you can have the fun of printing yourself. And of course it is intended to be a motivation for you to visit the excellent British Museum to view all their wonderful ancient displays.

