There’s no doubt that the Xreal Beam Pro is a very useful tool to have around if you’re into 3D photography. Despite the stingy 50mm lens separation, and lack of flash for 3D photography, it takes quite vibrant images and video, with a field of view much wider than, say, the Fuji W3. But, unfortunately, the camera app seems not to have been written with 3D photographers in mind. For example, you can take only 12mp 3D photos, despite the sensors allowing 50mp in 2D mode. And even worse is the mean 1080p maximum video resolution. Plus the Android OS is set only to expose one of the two cameras to developers code, making writing an app to take advantage of the stereo cameras unnecessarily difficult.
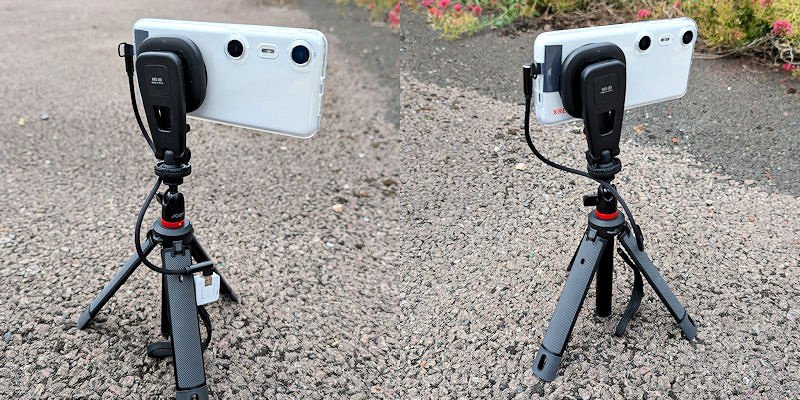
I’m quite happy to put aside those negatives of the Beam Pro, simply because the quality of the images and video it does allow is very good. But I find the lack of any creative camera modes more problematic – timelapses, for example, should, in my mind, be included in their app. But, as it is not, I decided to find a solution. And while it may be a bit of an unnecessarily complicated hack, it does work. That hack is, very simply, to use a microcontroller with a button as a USB keyboard, which operates the shutter button in the stock camera app. And in case you wonder what it looks like, it’s the little white box dangling from the USB cable in the photo below.
So below I’ll go through how to make the intervalometer, how I used it to get still image frames, how I used Python to create 4×4 grid images and how I used FFMPEG to create the timelapse video. It’s quite simple to dispense with Python, and just use FFMPEG, for those last two steps, but I did it that way to try some simple compositing and to allow adding Python-coded overlays in the future.
1. Building the intervalometer.
Not all microcontrollers support being used as a USB keyboard and not all support being programmed in the Arduino IDE. A very promising microcontroller which does is the ESP32-S3, which can be bought in various forms relatively inexpensively. I decided on the M5Stack AtomS3 Lite (see details here on Pi Hut) as it has a built-in button, RGB LED and Type-C USB port. So I’ll use it in this post to describe how I made the timelapse intervalometer, which needs no other electrical circuitry attached (unless you want to adapt the code for external shutter triggers). For other microcontrollers you may, therefore, need to adjust the code.
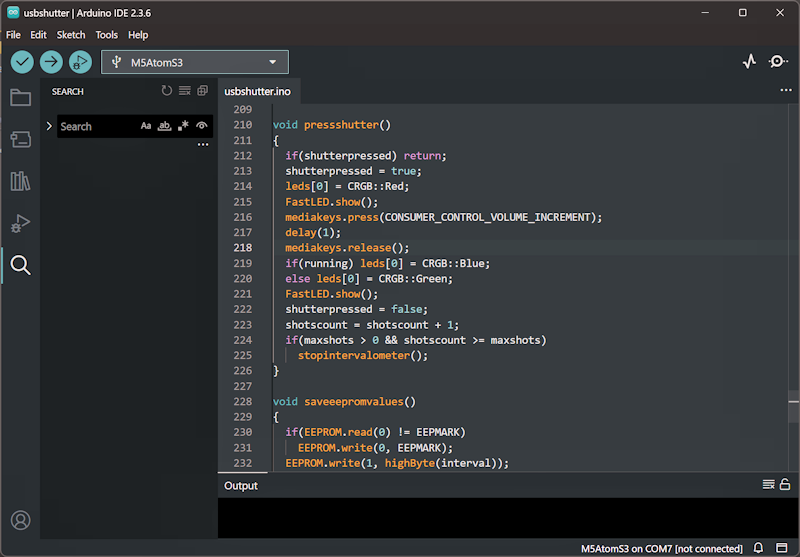
Once you have a suitable microcontroller and a USB cable you’ll need to set up the Arduino IDE (see here if you don’t already have it) with the libraries for the AtomS3 Lite installed (see the M5Stack docs for that here). Then you can download the source code file from the Parth3D experiments repository on Github. With the code open in the Arduino IDE it should look something like the screengrab below.
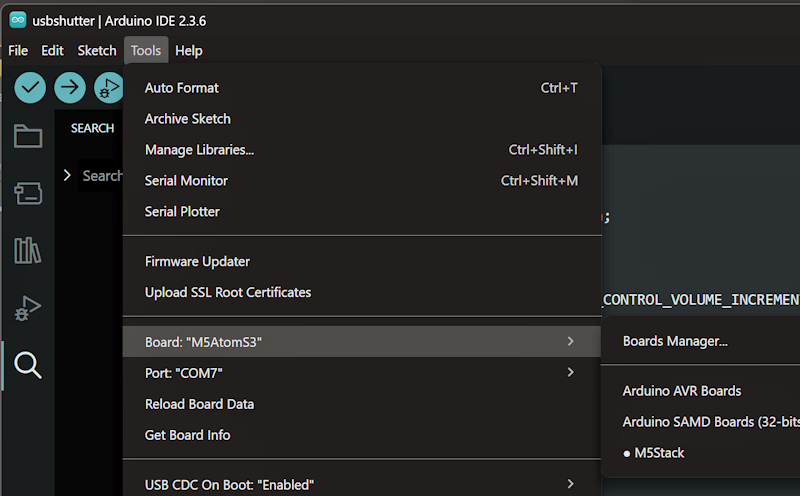
Now you can connect the microcontroller to your PC to be programmed. With the AtomS3 Lite you also need to hold down the reset/program button on the side until the green light appears, then release it to trigger it being recognised as a serial port in the Arduino IDE (see the M5Stack docs for more on that). You should also check in the ‘Tools’ menu that you have the board type set to M5AtomS3 and the serial port set correctly. Those settings, on my computer, are shown in the screengrab below.
You’ll notice at the top of the code that the interval is set in tenths of a second – the default is 10 which amounts to one second between shutter presses. That works quite well for what I do, but you can change it to a different value if you prefer. I decided that in more challenging conditions the Beam Pro will need most of a second to set the exposure, focus and save the image. So for intervals less than a second please be aware you may get odd behaviour and even inconsistent timings. And having said that, all you need to do is click the program button in the Arduino IDE and wait for the AtomS3 Lite to finish being programmed.
2. Using the intervalometer in the field.
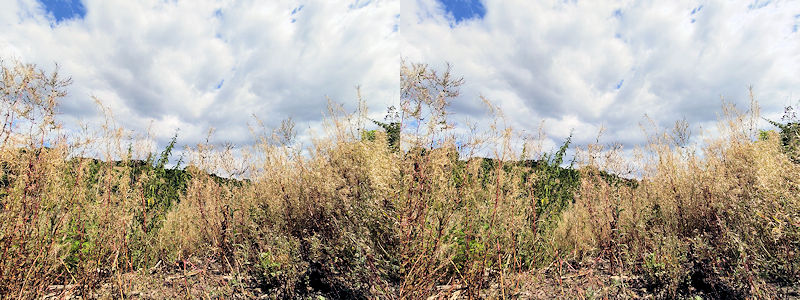
With the microcontroller programmed I took it along to the great outdoors and set it up with the Beam Pro on my MagSafe tripod. With it set at the default one second interval I pressed the button and left it for around twenty minutes, pointed at some plants and a cloudy sky. That left me with 1230 12mp frames, taking up a whopping 9.87gb of storage, suitable for 41 seconds of timelapse video. It would have been nice if the Beam Pro had options for smaller images, but at least the 12mp images allow for 4k timelapses if you feel so inclined. Below is one of the 3D stereoscopic frames as an example.
3. Processing the frames with Python (optional).
Strictly speaking we don’t need Python for this step, as FFMPEG can split side-by-side videos and create grids. And if you’re only interested in a parallel viewing side-by-side video you can ignore this step completely. In fact, the Python script on the Parth3D experiments Github repository may seem extremely slow even on a fast computer, especially with large frame counts. However, I wanted to explore using Python for compositing, overlaying and all sorts of other creative stuff. So I’ve included it here in case you’re interested in that. And if you don’t use the Python code you’ll either have to hope you don’t get any frame order issues, or you adapt the code to just rename all the frames to include the order in the way described below.
The most important thing to note about the Python code is that it reads a list of images from a ‘timelapse’ folder. But the Beam Pro files have a naming convention (e.g. in the format SV_YYYYMMDD_HHMMSS.jpg) that makes things a bit complex for FFMPEG later. I also worried that the frames may end up in the wrong order if I just made use of the files modified date, as that can change when files are moved around. So the code reads the filename list and uses the date and time included in it to order the list into date/time order. That should ensure our movie has all the frames in all the right places. The function to do that is below.
def sort_beam_pro_file_names_list(flist):
    rfl = []
    for fl in flist:
        hr = int(fl[12:14]) * 60 * 60
        mn = int(fl[14:16]) * 60
        sc = int(fl[16:18])
        rfl.append([hr + mn + sc, fl])
    rfl.sort(key=lambda x: x[0])
    return [row[1] for row in rfl]
Basically, for each filename string it extracts the substrings, at the expected position, for the hour, minute and second, then converts that to a number of seconds. So if you do really long timelapses, or just like doing photography around midnight, you should change the code to use the day, month and year too. A temporary list is used to store a list for each item, containing the number of seconds and the filename. That’s so we can sort the list, in the penultimate line of code, based on the first column – i.e. the one with the seconds value. The final line of code just returns the list with the seconds column removed.
Before you use the code I should also mention that it uses the Python 3 Photos3D library, which you can download from the repository on Github if you don’t have it already. You can either set it up as a global Python library or, much more simply, copy the ‘photos3d’ library from it into the folder where you run the ‘dotimelapse.py’ code. The reason it uses that library is because it can make working with stereoscopic images easier and allows us to play with all sorts of image operations. In this case it includes code to easily make a 2×2 grid from a side-by-side image (parallel top, cross-eyed bottom). Here’s a snippet from that code.
lim, rim = sbsim.load(fns + fl, maxwid=1280*2, dosplit=True)
top = sbsim.create(lim, rim)
bot = sbsim.create(rim, lim)
sqim = sbsim.create(top, bot, mode="ud")
All it does is read an image frame from our timelapse, split it into left and right frames, create side-by-side top and bottom images, and then create the grid. It saves the new 2×2 frames as images in a folder called timelapseoutput. But, importantly, it saves them with an easily parsed frame-order embedded in the file name. The code snippet below shows what I mean, as the filename will include the frame number as six digits with leading zeros. Of course, if you were brave enough to try for timelapses with a million or more frames, you’ll need to change the six to something bigger.
fname = "." + os.sep + "timelapseoutput" + os.sep + "frame"
fname = fname + str(f).rjust(6, '0') + ".jpg"
sqim.save(fname)
If you run the code at your commandline, using something like ‘python dotimelapse.py’, you should see the timelapseoutput folder filling up with lots of new images. An example from my timelapse output is shown below.

4. Making our timelapse video with FFMPEG.
So with the individual frames processed by Python into 2×2 grids (each with four 720p images) their size on disc was a much more manageable 1.24gb. And, most importantly, they had been renamed to a numbered order, such as ‘frame000012.jpg’, instead of using a date-based file name. That allowed me to use the FFMPEG command below to join them all together into a single 720p MP4 video – it’ll need minor changes for Linux and MacOS, mostly due to the separator. I could have used 1080p, or even 4k, if I’d wanted, but that choice left me with a file size suitable for online use.
ffmpeg.exe -framerate 30 -i ".\timelapseoutput\frame%%06d.jpg" -c:v libx264 -pix_fmt yuv420p -vf scale=1280:720 timelapse3d.mp4And below is the result – the first ten seconds from my Xreal Beam Pro timelapse video test. In case you wonder, the other 31 seconds were equally exciting 😉
And that’s all that’s needed to make a timelapse movie with the Xreal Beam Pro. Well, OK, it is a bit long-winded, and certainly nothing like having a timelapse mode in the camera app. But as such a mode was left out by the developers, at least we made the most of it and, if we want, we can also use it with other Android, iOS and iPadOS devices. Plus, I hope, we learnt something new and fun in the process 🙂


