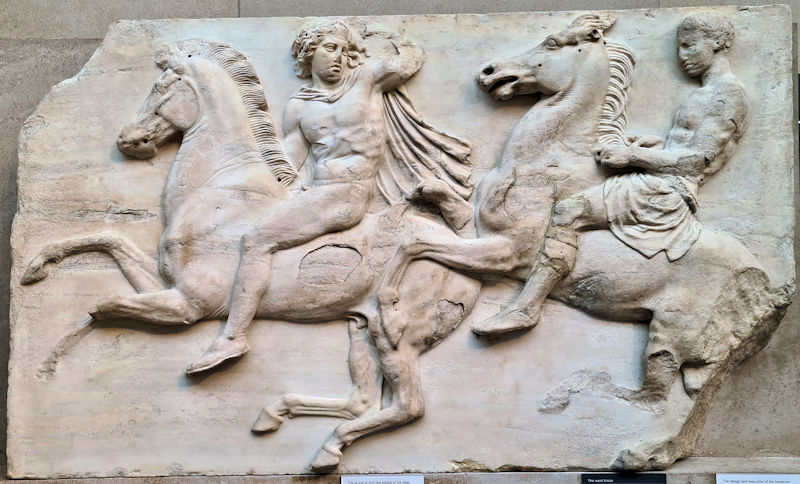
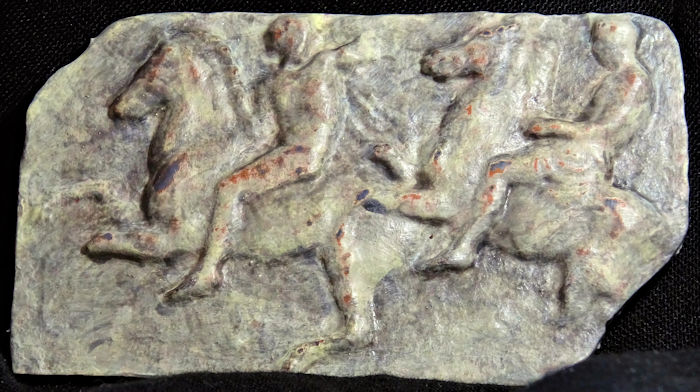
This is a basic 3D scan of one of the west frieze Parthenon Marbles at the British Museum in London. It is a beautiful artefact and depicts two horsemen in action, who would originally have adorned the Parthenon in Athens, ancient Greece. The British Museum collection is also known as the Elgin Marbles, having been brought to England by agents of the 7th Earl of Elgin in the early 1800s (see Wikipedia for more background on Elgin and the friezes). And despite the arguments about their true ownership, based on debates about the legality of Elgin’s actions, nobody can doubt their beauty and historical importance. So I obviously wanted to add one to my collection of 3D printed ancient artefacts.
Quick summary of this 3D creation
Overview: A basic scan of a Parthenon marble at the British Museum in London.
Location: British Museum, London [map].
Date/era: Ancient, 443 to 437 BC.
Reference: WEST FRIEZE II, 2-3 [see also].
Software used: Sony 3DCreator Android app, Nomad Sculpt Andoid app, Blender.
Intended use: 3D printing of a miniature model, preferably in resin.
Download: MyMiniFactory page.
The information board with the marble states ‘This is one of only two blocks of the west frieze in the British Museum. The leading horseman looks over his shoulder. His left arm is raised, perhaps to adjust a bronze wreath, now lost, or to give a signal.’. And the information for the west frieze adds ‘The west frieze is mostly in Athens. Modern casts of these reliefs are displayed in Room 18b. The west frieze shows scenes of horsemen preparing for the cavalcade to come. It is exceptional in that each block presents a complete picture, without the overlapping that occurs on the other three sides.’
The scan was made with the excellent Sony 3DCreator app on an Xperia XZ2 smartphone, mounted on a selfie stick due to the height the marble is displayed at. It did a very good job of capturing the shape and, due to the texture of the surface aiding photogrammetry, the finished scan only needed a small amount of editing. However, there was some unavoidable loss of detail, such as around the head areas, so the scan can’t be considered an exact replica of the marble. But for use in making a 3D printed miniature, which was my primary goal, there’s still plenty of detail.
The initial editing was done in Nomad Sculpt, on an Android tablet, basically tidying up some minor defects in the scanned surfaces and trimming off excess ‘material’. I didn’t voxel remesh it in Nomad as I wanted to retain the fine details and avoid creating unwanted artifacts. The scan was then loaded into Blender on a PC, where it was properly oriented and scaled to a sensible size for 3D printing (I chose 50mm high) and the thickness trimmed a little to reduce printing-material use. You can see the result of that work on Sketchfab below (click the play button to load the model and view it in 3D).
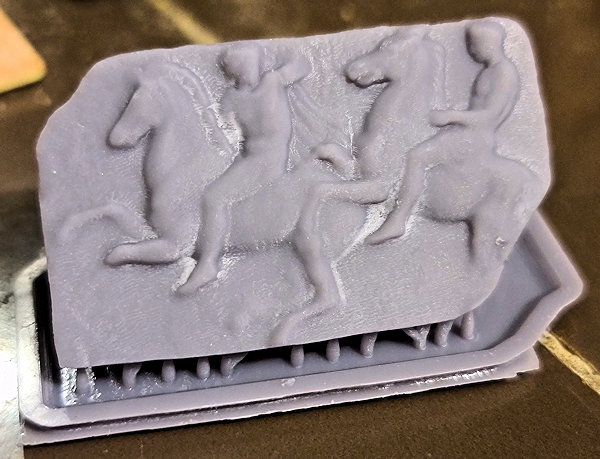
The miniature marble was then printed in my Anycubic Photon Mono SE SLA printer, as I wanted to retain as much detail as possible. The resin was gray Elegoo water-washable UV-cured resin, as it is easier to clean off uncured resin compared to ‘normal’ resin, and there is much less in the way of obnoxious odours. You can see the results of the printing, at 50mm high, in the photo below.
I decided to use The Army Painter paints to finish off, as I have a good range of them, starting with a coat of their brush on primer to help ensure good adhesion. Then I gave the print a coat of their Tanned Flesh paint mixed with some Arid Earth. After that I mixed some black, Arid Earth and Matt White, diluted with some of their wash medium. I stippled it on so that the finish would have varying amounts of the base colour showing through. Then I distressed the surface a little using a very fine sanding-sponge sheet, to randomly reveal some of the base colour. Finally, a coat of Citadel Technical Stormshield clear varnish helped control the glossiness. The finished version can be seen in the photo below.
So finally, in case you’d like to use the methods in this project for your own work, let’s recap on what was involved:
- The Sony 3DCreator Android app was used to create a basic 3D scan on a smartphone.
- Nomad Sculpt was used on an Android tablet to remove excess digital material and repair scan defects.
- On a PC Blender was used to rotate, scale, translate and trim the model.
- The finished 3D model was then test printed in resin, and found to print to an acceptable quality.
- The resin print was then painted using The Army Painter paints.
Please note that this scan is provided without any license for commercial use. It is intended simply as a model of an ancient artefact you can have the fun of printing yourself. And of course it is intended to be a motivation for you to visit the excellent British Museum to view all their wonderful ancient displays.


