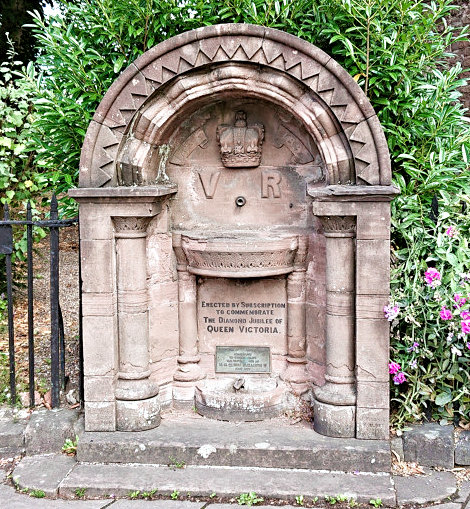
In Victorian England 1897 was jubilee year, which celebrated 60 years of Queen Victoria on the UK throne. It was a cause for celebration and partying by the UK population and throughout her empire. According to Wikipedia, Victoria herself celebrated it at a banquet attended by “fifty foreign kings and princes, along with the governing heads of Britain’s overseas colonies and dominions“, which gives some idea of the pomp and ceremony around her achievement. One common way of celebrating it was through erecting public monuments, including ones with functions for the public good, such as the old water fountain next to the church of St Thomas the Martyr in Monmouth, South Wales (click here to see a full 3D scan). It’s a beautiful old monument that can be found just over the old bridge from the car park at the bottom of the town. So, this is my attempt at a 3D scan of the old Victoria crown inside it for posterity, and of course for some fun 3D printing and painting too.
Quick summary of this 3D creation
Overview: A basic scan of a carved stone Queen Victoria crown on the old water fountain outside St Thomas the Martyr Church in Monmouth.
Location: St Thomas the Martyr Church, Monmouth, South Wales, United Kingdom [map].
Date/era: Late Victorian, 1897.
Software used: Sony 3DCreator Android app, Meshmixer.
Intended use: 3D printing, either in resin or fused filament, the latter being possible without any support material.
The scan was done with the Sony 3D Creator app on an Xperia XZ2 smartphone. Fortunately, the crown was at a low height and so easy to get to, and move the camera around, to easily get a complete scan. Using 3DCreator obviously means the scan doesn’t contain small details, largely because the crown doesn’t have much surface texture for use with photogrammetry scanning methods. However, I did move the camera close to the surface, at the end, to increase detail and ensure the main features of the crown came out acceptably. So overall 3DCreator did do a very good job of representing the shape and form as a record of the crown for posterity. And, given that 3DCreator is provided free by Sony, and is easy and quick to use, I don’t really think I can complain about the quality of the 3D scan. In fact, I think it makes a good addition to my collection of historical 3D prints.
The scan was then post-processed using Meshmixer to remove extraneous areas and to remesh to a sensible file size for speed of use in the Sketchfab viewer, as well as to allow speedy downloads. The solidify tool was used for that, with the sharp edge preserving setting allowing a sensible file size with minimal loss of the limited detail contained in the original scan. If I’d done the scanning more recently, I think I would also have used Nomad Sculpt, before Meshmixer, as the pressure-sensitive tools (when used with a tablet computer with a pen/stylus) would allow for much better sharpening around the edges of features (using the crease tool with a small radius). However, the results from Meshmixer were very good, in my opinion. You can see the finished model on Sketchfab below (click the play button to load the model and view it in 3D).
The example 3D print in the photo below was made using a Monoprice Mini SLA resin printer, using standard UV-curing resin, and I think it came out very well despite being a little less than 25mm wide. However, there are no sharp overhangs that would result in annoying removal of support material, when fused-filament printing, if the back is flat on the print bed. Therefore, resin printing isn’t really necessary for you to do a good 3D print, although for mine the small size made it a much better option so as not to lose too much detail. If you want to try 3D printing it yourself, click here to go to the MyMiniFactory page to download it.
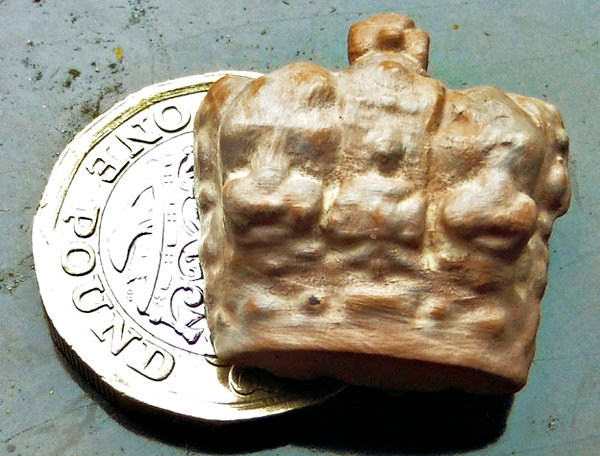
The print was then painted using Pebeo craft acrylics to give a clay effect, and then given a protective coat of matt varnish that has the added advantage of controlling shininess. Craft acrylics are quite thick, so they caused some loss of detail, although I won’t be viewing it very closely so wasn’t too worried about that. Thinner paints (such as The Army Painter or Citadel ones) could have been a better option as resin layer lines are very fine and so easier to hide with thinner paints. But overall I was quite pleased with the result, and I think it looks good in my collection of 3D prints of historic architectural features. Plus, at less than an inch wide, it doesn’t take up much space.
So finally, in case you’d like to use the methods in this project for your own work, let’s recap on what was involved:
- The Sony 3DCreator Android app was used to create a basic 3D scan on a smartphone, which provided a good representation, albeit with loss of detail on sharp edges.
- On a PC Meshmixer was used to tidy the 3D scan, including cutting away unwanted material, smoothing poorly scanned areas, and sharpening edges.
- Meshmixer was also used to solidify/remesh the model, to achieve a much smaller file size, using the sharp edge preserving setting to minimise loss of fine details.
- The finished 3D model was then test printed in resin and found to print to an acceptable quality, even at a small size.
- Due to the limited amount of detail in the final model, and the ability to print without support material, fused-filament 3D printing can also be considered a good option for larger prints.
Please note that this model is provided without any license for commercial use. It is intended simply as a historical model you can have the fun of printing yourself. And of course it is intended to be a motivation for you to visit Monmouth yourself and, while there, walk over the old bridge to view this beautiful old Victorian crown: click here to see the location in Google Maps.

