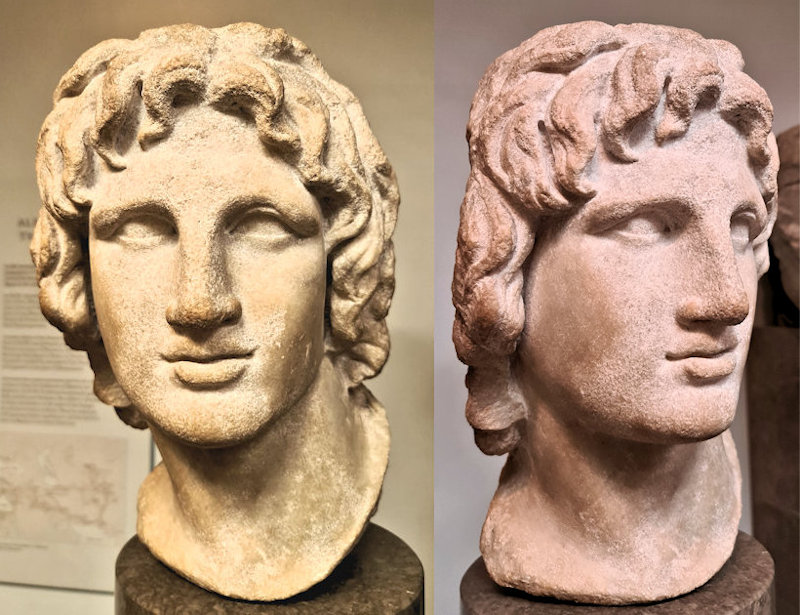
Alexander III of Macedon was an ancient Greek king who came to his throne in 336 BC, at just twenty years old. Then, within only ten years, he had created an empire that stretched all the way from Greece to the west of India (see Wikipedia for more details). While he lived long before the days of social media, he knew that controlling such a large empire meant also ensuring his image was prominent for all his subjects to see. And, of course, not just to see: for many he was to be worshipped as a god even during his lifetime. So while visiting the British Museum I couldn’t resist the opportunity to 3D scan a basic replica of their marble portrait of him, said to be from Alexandria between the 2nd and 1st Century BC.
Quick summary of this 3D creation
Overview: A basic scan of a marble portrait of Alexander the Great.
Location: British Museum, London [map].
Date/era: Ancient, 2nd – 1st Century BC.
Reference: GR 1872.5-15.1 (Sculpture 1857)
Software used: Sony 3DCreator Android app, Nomad Sculpt Andoid app, Meshmixer, Blender.
Intended use: 3D printing of a miniature model, preferably in resin but it should give acceptable results in fused-filament printers too.
Download: MyMiniFactory page.
The British Museum information board next to the portrait states ‘During his life Alexander was a master of propaganda and carefully controlled the numerous representations of his portrait set up throughout his empire. Alexander selected only a few sculptors and painters to produce his image, and they portrayed him with a youthful, clean-shaven face, long hair and a dynamic turn of the head. This type of portrait was loosely adopted by Alexander’s successors but had a greater influence on portraits of later Hellenistic kings and private individuals. Alexander was deified in his own lifetime, and after his death he was worshipped as a god in images such as this.‘
The scan was made with the excellent Sony 3DCreator app on an Xperia XZ2 smartphone. It did a very good job of capturing the shape and the finished scan needed little editing. That was partly because the texture of the marble aids photogrammetric techniques, but also the time-worn surface adds extra texture the app could pick up quite easily. Compared to 3D scanning bronzes or polished plain-coloured stone, for example, capturing this portrait was therefore quite quick, easy and enjoyable.
I then used Nomad Sculpt, on an Android tablet, to tidy up some minor defects in the scan and trim off excess ‘material’. However, I didn’t voxel remesh it in Nomad as I wanted to retain the fine details, such as around the eyes, and not create any unwanted artifacts. The scan was then loaded into Blender on a PC, where it was properly oriented and scaled to a sensible size for 3D printing: I chose 50mm high as it’s a good size for displaying, but there’s enough detail to create a much bigger version. You can see the result of all that work on Sketchfab below (click the play button to load the model and view it in 3D).
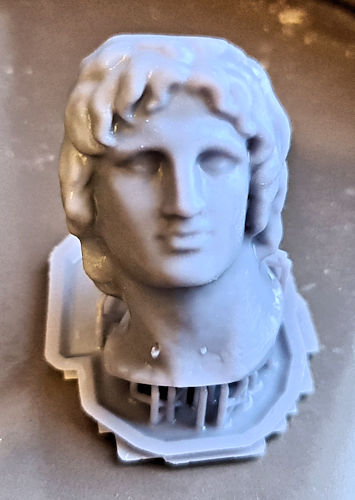
I decided to print the portrait in my Anycubic Photon Mono SE SLA printer using Elegoo water-washable UV-cured resin, as I wanted a miniature that retained plenty of detail. So first I loaded the model into Meshmixer on my PC, and used the hollow tool with a wall thickness of 2mm. Then I created a hole in the bottom using the meshmixing and constructive solid geometry tools. That meant I only had to use a fraction of the resin I would have needed if I had printed the model solid, which also happily saves on cost. You can see the results of the printing (at 50mm high) in the photo below.
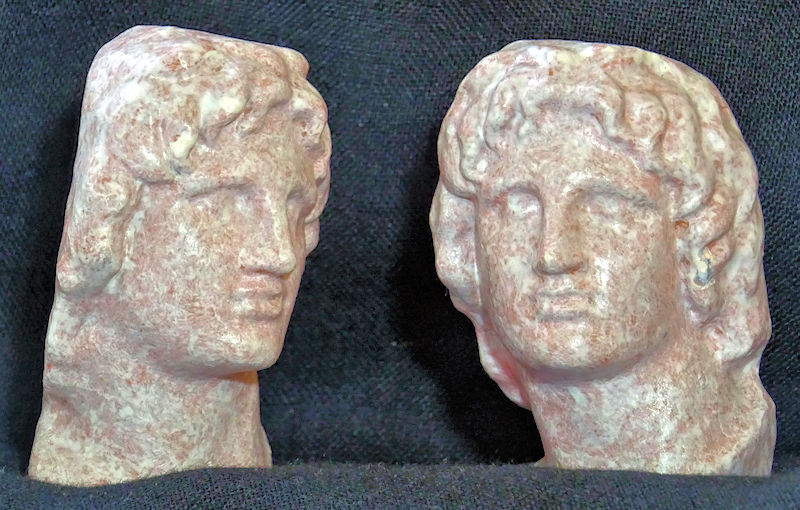
For the painting, I decided to use The Army Painter paints, starting with a coat of their brush on primer to help ensure good adhesion. Then I gave the print a coat of their Tanned Flesh paint as the marble has a reddish tint showing through that I wanted to try to recreate. After that had dried I used some Arid Earth and Matt White, mixed with some of their wash medium. I stippled it on so that the finish would have varying amounts of the Tanned Flesh coming through, and so avoid a flat colour. Finally, a coat of Citadel Technical Stormshield clear varnish helped reduce the glossiness to a sensible level. The finished version can be seen in the photo below.
So finally, in case you’d like to use the methods in this project for your own work, let’s recap on what was involved:
- The Sony 3DCreator Android app was used to create a basic 3D scan on a smartphone.
- Nomad Sculpt was used on an Android tablet to remove excess digital material and repair scan defects.
- On a PC Blender was used to rotate, scale and translate the model.
- Also on a PC, Meshmixer was used create a hollow version for resin printing, with a drainage hole in the bottom.
- The finished 3D model was then test printed in resin, and found to print to an acceptable quality.
- Due to the limited detail in the 3D model, fused-filament printing should also produce acceptable results.
- The resin print was then painted using The Army Painter paints, attempting to recreate the marble look of the original.
Please note that this scan is provided without any license for commercial use. It is intended simply as a model of an ancient artifact you can have the fun of printing yourself. And of course it is intended to be a motivation for you to visit the excellent British Museum to view all their wonderful ancient displays.

