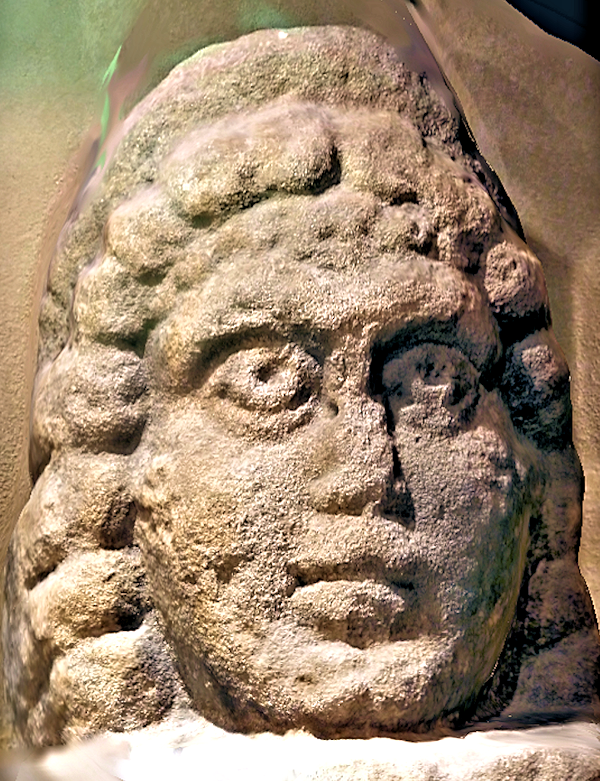
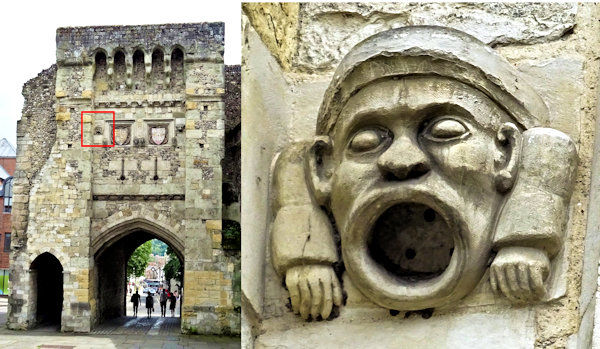
There are a number of gargoyles (according to Wikipedia, a carved grotesque form intended to route water away from stonework) on the old Westgate Museum in Winchester, in southern England (a very short walk from the A Promise Honoured war memorial sculpture). Most are very old and eroded, but one is in very good condition and, while not as grotesque as many gargoyles, is obviously intended to prevent rainwater running over, and so eroding, the stonework below. Given that the museum is in the remains of a fortified medieval gateway (that is, the west gate into and out of Winchester), the condition of that gargoyle suggests it is a more recent repair, although no information has been found about it through online searches.
Quick summary of this 3D creation
Overview: A digital 3D sculpt of a gargoyle in the style of one found high up on the medieval gateway that is now Westgate Museum in Winchester.
Location: Westgate Museum, Winchester, southern England, United Kingdom [map].
Date/era: Unknown but likely a modern replacement for a medieval gargoyle.
Software used: Nomad Sculpt Andoid app, Meshmixer.
Intended use: 3D printing, preferably in a resin printer at around 50mm or more square, but can also be printed with fused filament printers without support material.
Nearby: A Promise Honoured scan.
The gargoyle is also high up the wall, so it wasn’t possible to 3D scan it. Therefore, this model attempted to create a similar gargoyle in the same style, not exactly recreating the original but instead made as a homage to it. The model was therefore made with the excellent Nomad Sculpt Android app, based on a reference photograph (see above) taken using a long zoom. 3D sculpting, done carefully, does allow for the approximate recreation of the style of a real-world object, so was obviously a good candidate for this project (in fact, most likely the only real option).
Despite being intended as a 3D sculpting application, Nomad Sculpt has proved an excellent tool for processing and tidying up 3D scans, as it has many tools for trimming, sculpting and smoothing, as well as a gizmo tool to help you translate, scale and rotate. It was used on a Samsung Galaxy Tab S6 Lite as it has a pen/stylus that works very well with the pressure sensitivity feature of Nomad Sculpt, allowing easy and sensitive adjustments to be made.
3D sculpting often involves carving away a virtual lump of ‘clay’ to get to the final shape. But, this model was made using additive modelling: starting with a thin square block of ‘clay’ in Nomad Sculpt, material was added with the clay brush to build up the shape over the reference image. That was possible because Nomad Sculpt allows you to move and resize the reference image, as well as adjust its opacity, so that you can see it over the ‘clay’ during sculpting. The smooth brush was used often too as a way to prevent unwanted build-up of lumps, and the crease tool helped create sharp edges when set to a very small brush size. You can see the model in Nomad Sculpt in the screenshot below, with the reference image at the bottom right.
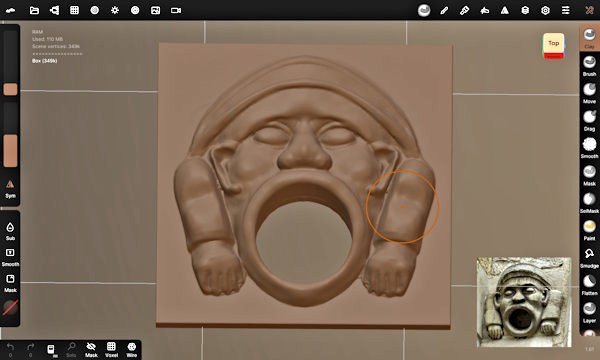
The finished sculpt was then post-processed using Meshmixer to remesh to a sensible file size. That was very important as the need to use a high polygon count in Nomad Sculpt, in order to carve out fine details and sharp edges, results in a large file size. Obviously that may not be important for many purposes, but it does mean it loads quicker in the Sketchfab viewer, and downloads faster too. Remeshing was based on the Meshmixer solidify tool and the sharp edge preserving setting was used to help ensure few fine details, and of course sharp edges, were lost. The remeshing did however leave some artefacts, particularly in the creases, but not to the extent that they significantly impact on print quality. You can see the finished model on Sketchfab below (click the play button to load the model and view it in 3D).
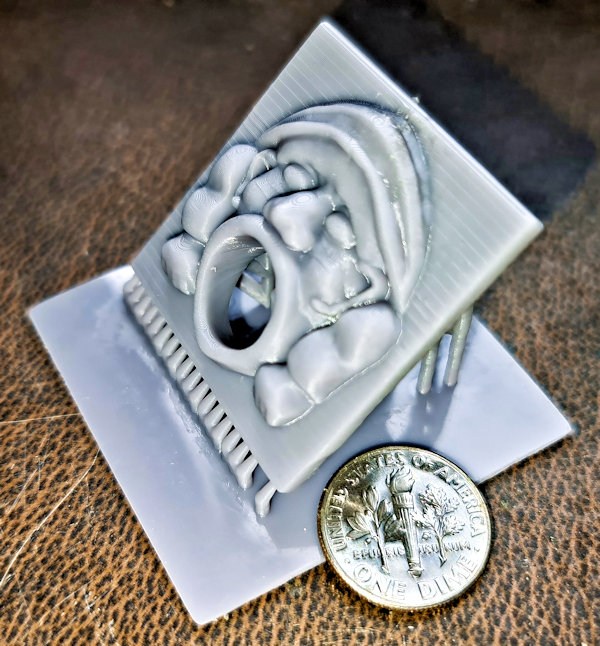
The 3D print in the photo below was made using a Monoprice Mini SLA printer with Elegoo water washable resin, and it did a good job of recreating the detail in the model. Despite water-washable resin sometimes having a little trouble retaining sharp edges, the print quality was quite pleasing. The model was also tested using Flashforge PLA on one of their Adventurer 3C printers and it came out very well. In fact, using the fine printing settings in the Flashforge slicer resulted in very usable 3D prints of the gargoyle in PLA, even down to small sizes such as 50mm square. And the resin print in the photo was later finished with The Army Painter paints, and a coat of anti-shine varnish, to create a light stone look and feel.
So finally, in case you’d like to use the methods in this project for your own work, let’s recap on what was involved:
- As access to 3D scan the gargoyle wasn’t possible due to its height, a reference photograph was taken using a long zoom zens.
- The Nomad Sculpt Android app was used to sculpt the 3D model, starting with a square block of ‘clay’ and adding material over the reference image.
- The smooth brush was needed to help keep the surfaces uniform and ensure the finish looked natural.
- The crease tool was very important as it allowed creation of sharp edges around the added ‘clay’, as well as helping maintain the deeper areas between features.
- On a PC Meshmixer was used to solidify/remesh the model, to achieve a much smaller file size, leaving some artefacts not considered to impact too much on 3D printing.
- The finished 3D model was then test printed in resin and PLA, and found to print to an acceptable quality with both material types.
- Due to the amount of detail in the final model, resin printing was found to be the best method of 3D printing it, although not to the extent that fused-filament printing should not be considered a good method.
Please note that this scan is provided without any license for commercial use. It is intended simply as a model you can have the fun of printing yourself. And of course it is intended to be a motivation for you to visit beautiful Winchester yourself and maybe even crane your neck upward to see the gargoyle when you visit Westgate Museum: click here to see the location in Google Maps.

