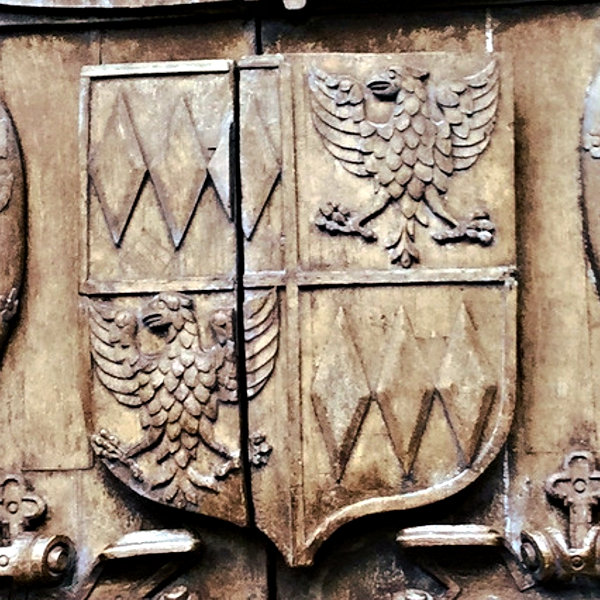
Carvings of eagles in wood are quite common in old buildings, especially in churches, abbeys and cathedrals. They add an ambience that is hard to match in modern days. And with the popularity of movies with an old time feel, like the Harry Potter franchise, they can be a nice addition to any home. So when I found this early-1600s eagle carving on the west door of Bath Abbey, shown in the photo below, I was inspired to make a basic 3D scan for 3D printing.
Quick summary of this 3D creation
Overview: A basic scan of the eagle from the Montague arms on the west door of Bath Abbey.
Location: Bath Abbey, Bath, western England [map].
Date/era: Early 17th Century (c. 1617).
Software used: Sony 3DCreator, Nomad Sculpt, Meshmixer.
Intended use: 3D printing of a miniature model.
Download: MyMiniFactory page.
While I wasn’t intending to scan a recreation for any historical recording purpose, the background to this eagle is very interesting. It’s from the Montague (a.k.a. Montagu) family coat of arms. Those arms can be found there because the doors were added to the abbey in the early 17th Century (c. 1616-17) as part of the restoration works James Montague funded following the end of the Dissolution of the monasteries. In fact, he is said to have provided, as the Bishop of Bath and Wells, £1000 for a new roof. If you want to know more a good place to start is the Bath Abbey website or the Wikipedia page.
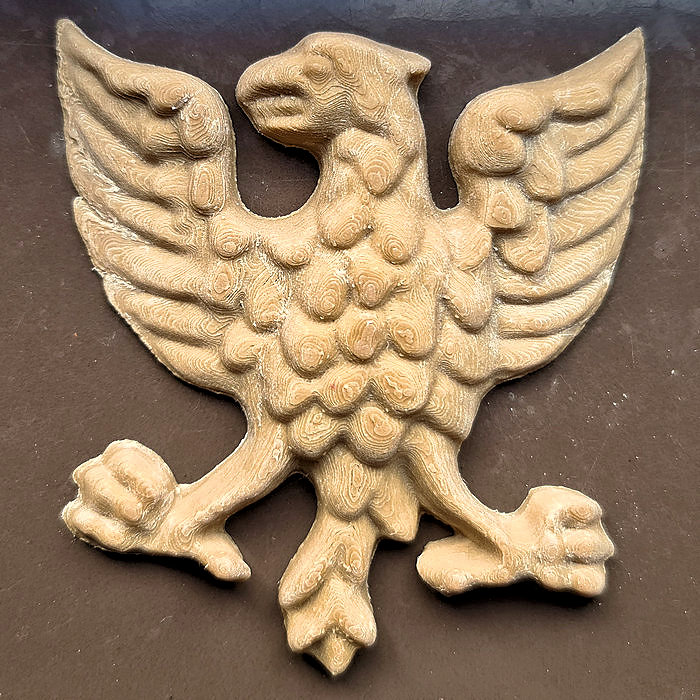
I made the scan with the Sony 3DCreator Android app and I think it came out quite well. However, it needed some tidying up before I could 3D print it, including to remove artifacts where the scanning could have been better. So I imported the scan into the Nomad Sculpt Android app, where I was able to carve away unwanted ‘material’ and use the crease tool to sharpen edges (which can often be rounded-off in simple scans). From there it was imported into Meshmixer on a PC, where it was remeshed, resized and cropped from the background using the plane-cut tool. You can see the result of all that work on Sketchfab below (click the play button to load the model and view it in 3D).
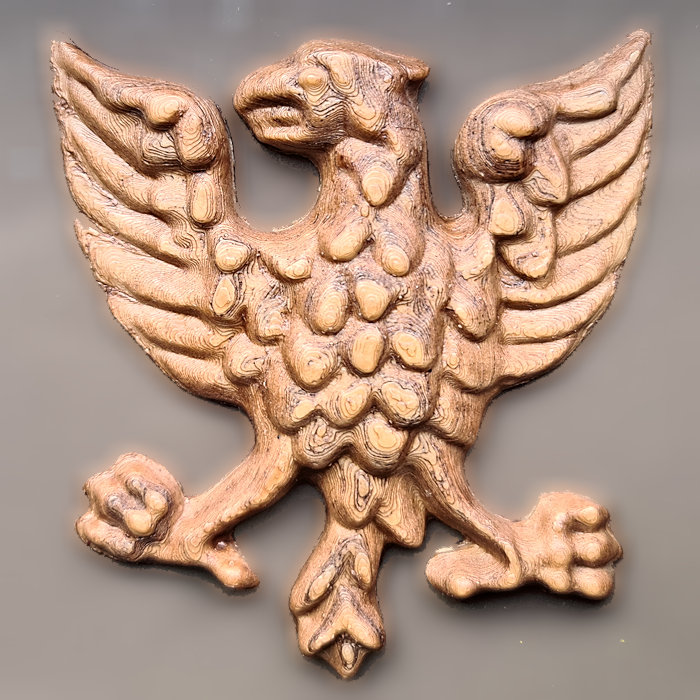
The model in the photo below was printed in my Flashforge Adventurer 3C printer. The 3D model is scaled in thickness (done as part of the Meshmixer step) by around 25%, to help bring out the detail when printed flat on the print bed with no support material. Obviously better results would come from printing it upright, or at least angled to the bed, which would require supports. However, I decided to use wood-infused PLA filament which is quite easy to sand, so I was quite happy with the results.
One of the things I like about wood-infused PLA is that it can be stained a bit like real wood. And the layer lines often absorb a bit more stain which can give a ‘sort-of’ woodgrain effect. So after some filing and sanding I added a single coat of water-based dark mahogany wood dye with a small sponge. I was careful to ensure it didn’t pool so that I would get an even colour, and after drying I gave it three coats of Citadel Technical Stormshield varnish: it gives a light but not overwhelming shine that accentuates the old-wood effect. My completed eagle wood carving (around 80mm high) then looked like the photo below.
And that’s it for old eagle scanning and carving for now. I hope you enjoy 3D printing your own version to add an olden-days feel to your home or office 🙂


