Ever since consumer-level 3D digital cameras appeared on the market I’ve wondered why they have to give us image file types that are harder to use than ‘normal’ digital photos. For instance, years ago I had one that saved JPS (stereo jpeg) files. That wasn’t too bad as it turned out I could just change the JPS extension to JPG and load a side-by-side image in my photo editor, because it was actually a single jpeg image. But then they started using MPO files which most image editing software knew nothing about. These days it’s a bit easier as even software like Paint Shop Pro can open them, although as two images you have to manually copy and paste to make a single side-by-side photo. So, how can we easily open these MPO files for use in our Python 3 3D photo coding?
Well, it turns out that MPO files aren’t really image files as such. They’re actually more like a digital container. If you remember having film processed you’ll remember you used to get a paper wallet with the photos inside. MPOs are the digital equivalent of those wallets, containing a number of ‘normal’ 2D images as jpegs. And they have a small sequence of bytes that can be searched for to find where to split the file. So in the past, to load an MPO file in Python, you’d need to search for that sequence and manually copy the images out of the file. Then you’d have to convince Pillow to load them. But recently I discovered that Pillow now knows how to find the images in containers! So exciting, and so to start we need some imports.
from matplotlib import pyplot as plt
from PIL import Image
We’ll be using matplotlib to display our 3D views but PIL, the Python Imaging Library Pillow, will do all the hard work extracting the views. Obviously we’ll need an MPO file to try this out on, which I’ve named ‘mpotest.mpo’ but you can change the filename to whatever MPO file you use. And if you want an MPO to test with, you’ll find one on the Parth3D Github repo, together with the code if you don’t feel like typing. Armed with our MPO we can now open it with Pillow just like any other image file.
fname = "mpotest.mpo"
pim = Image.open(fname)
Even though we opened the file the same way as any other image, we can’t just use the image for drawing. Pillow knows the file is a container and expects us to tell it which image to find first. We do that using an integer index value, which is zero for the first image and increases by one for each subsequent image. That index value is used with the ‘image.seek’ method to tell Pillow which image to go to, then all we need do is copy the image. The code below does just that. Note though that it assumes the first image is the left view, and the second the right one. Some cameras may use a right to left order instead, so if you have a problem just swap the left and right variable names.
pim.seek(0)
lim = pim.copy()
pim.seek(1)
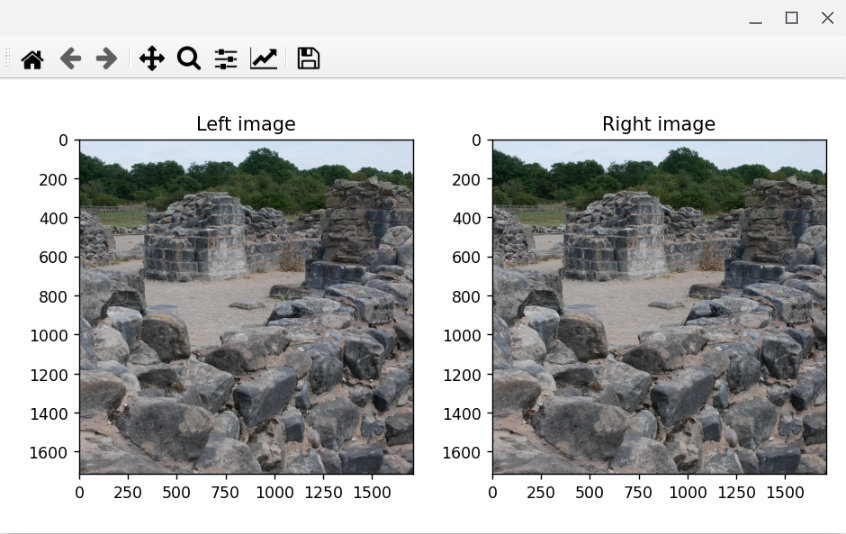
rim = pim.copy()Now we have two images which we can use like any other Pillow image. We could, for example, make a side-by-side image, or even create an anaglyph. Or, we could just save the left and right images to files for use in other software or code. But for now I’ll just show how to display them in a matplotlib plot to verify that eveything worked.
fig=plt.figure()
fig.add_subplot(1,2,1)
plt.imshow(lim)
plt.title("Left image")
fig.add_subplot(1,2,2)
plt.imshow(rim)
plt.title("Right image")
fig.tight_layout()
plt.show()
Now, if you run the full code, with the MPO in the same folder as the code, you should get a matplotlib plot just like the one below. If you used the MPO from the Parth3D Github repo you may like to know that the photo is of Bordesley Abbey in the English Midlands.
And that’s it. Basically MPO files are just digital containers that Pillow in Python can open to let us go to individual images to copy out into our own variables. It’s so much easier using MPO files for coding with this Pillow support and so I hope you found this post useful 🙂


